Normandy — D-Day — 6 June 1944
Pegasus Bridge
Pegasus Bridge
We are wrapping up a week-long visit to Normandy, having visited the landing beaches and many of the battlefields from the D-Day invasion of June 6, 1944. Now, near the end of our visit to Normandy, we're finally getting to where the D-Day invasion began, several hours before the landings: Pegasus Bridge.
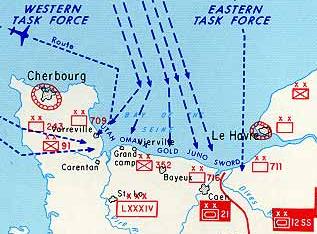
While the U.S. forces were landing well to the west — by air into the Cotentin peninsula the night of the 5th/6th, and by sea onto the beaches designated as Utah and Omaha starting the morning of the 6th, British and Canadian forces were landing on the three beaches to the east: Gold, Juno, and Sword.
Overnight on June 5th/6th, British and Canadian airborne infantry parachuted and landed gliders in this area forming the eastern flank of the Allies' vast landing operation. This eastern airborne operation was designated Operation Tonga.
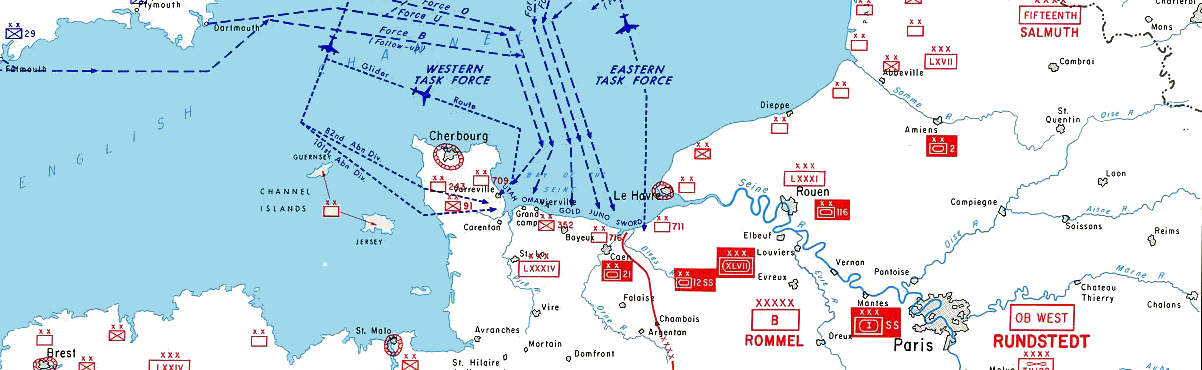
This map shows the Orne River (unlabeled) flowing through Caen from the southwest, and the Dives River paralleling the Orne for the final stretch of each before draining into the Bay of the Seine.
Details of a U.S. military map of the D-Day plans.
The area between the two rivers was an open flat plain with a well developed transportation infrastructure including roads, bridges, rail lines, canals, and navigable rivers. German armored forces could easily maneuver through this area to counterattack the Allies. Critical infrastructure such as the river crossings could be destroyed, but then the Allies would not be able to use it to break out of the landing zones and advance inland.
The ideal goal, difficult to achieve, would be to capture the river crossings, preventing their use by the Germans and preserving them for Allied used in the break-out.
The detailed 1:250,000 map shows the closely parallel Orne River and Caen Canal flowing from the city of Caen to the coast near Ouistreham. In 1944 just one pair of bridges, shown in red on this map, crossed the canal and river between Caen and the coast. These pair of bridges ran from near the village of Bénouville to Ranville, about 7 km from the coast. The river is to the east, closer to Ranville, with the parallel canal just a short distance to the west with a road from Caen to Ouistreham running along its bank. The bridge across the canal was then known as the Bénouville Bridge, named for the nearby village. The river bridge is just 500 meters away.
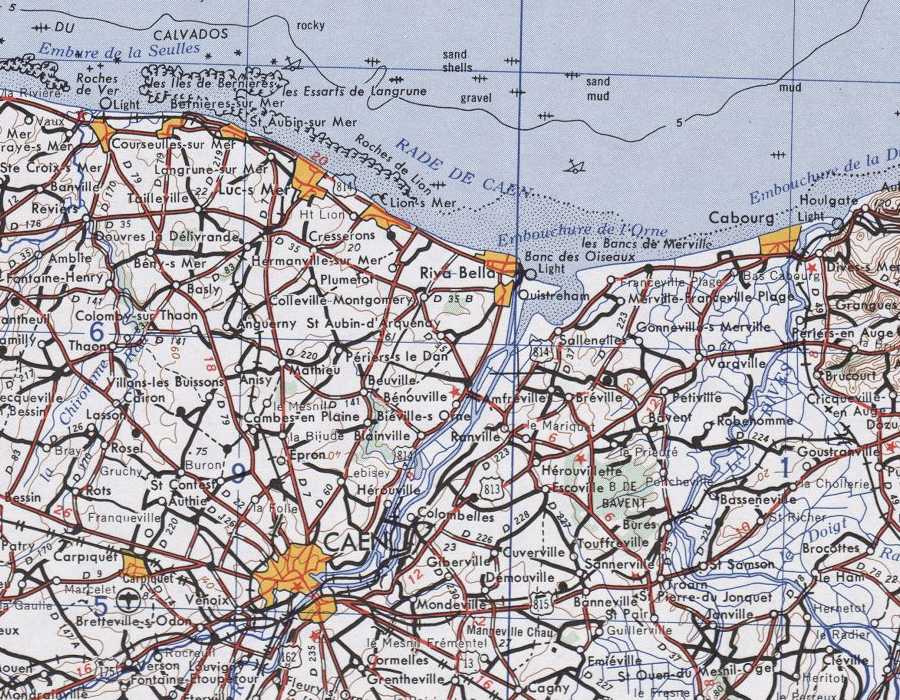
U.S. Army Corps of Engineers 1:250,000 map NM 30-9 from the Perry-Castañeda Library Map Collection at the University of Texas at Austin.
Elements of the British 6th Airborne Division accompanied by the 1st Canadian Parachute Battalion were tasked with capturing that pair of bridges across the Orne and its canal, destroying five bridges across the Dives River, and destroying a German artillery battery at Merville. The British unit's insignia was a winged horse, leading to the bridge being known ever since as Pegasus Bridge. The other bridge is now known as Horsa Bridge, named for the Horsa gliders in which the men arrived.
While German counterattacks led to continued fighting and casualties, the landings started just after midnight on 5/6 June and all objectives were accomplished by the end of the 6th.
Operation Deadstick was the codename for the airborne operation to capture and hold these bridges, the only eastward exit from Sword Beach.
Pegasus Bridge

Amazon 0671671561
Stephen Ambrose's Pegasus Bridge is an excellent explanation of all the details. Read it before visiting to fully understand what you're seeing.
Intelligence had reported that the Germans had heavily defended the bridges, and also installed explosive charges to destroy them if they seemed to be in danger of capture.
If the Germans held the bridges, they could use them to counterattack the landing Allies with heavy armored forces.
If the bridges were destroyed, the 6th Airborne Division would be stranded between the two rivers and cut off from the main Allied forces.
British planners concluded that a glider-borne assault would be the only means of capturing the bridges intact.
Visiting the glider base at Harwell, near OxfordSix Horsa gliders were towed from RAF Tarrant Rushton in southern England to deliver a reinforced company of six infantry platoons and an attached platoon of Royal Engineers to handle the demolition charges; one infantry platoon plus five Royal Engineers in each glider. This glider operation has commonly been described as one of "the most outstanding flying achievements of the war."
The Horsa glider had a maximum load of 7,140 kilograms or 15,750 pounds. This let them carry a crew of two pilots plus 28 infantry troops or a mixture of two jeeps, artillery, and trailers. The gliders were operated at the edge of their capabilities. The glider pilot commander had reported that a full load of men, ammunition and other equipment, and engineers' stores would dangerously overload a Horsa glider. So, two men were dropped from each platoon to get the glider load barely under its limits.
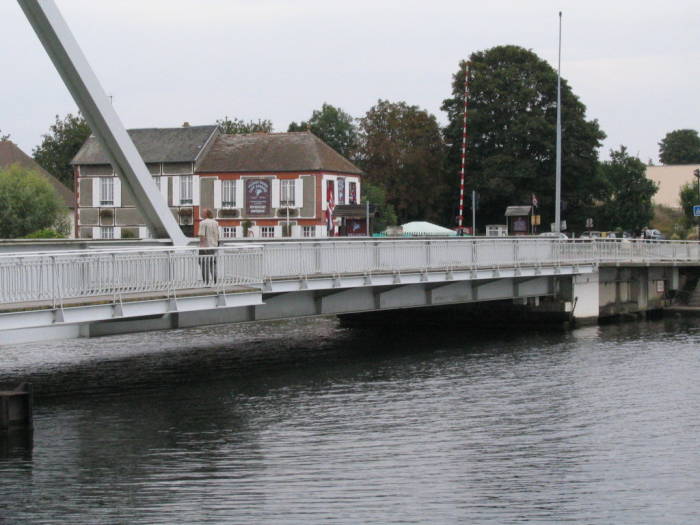
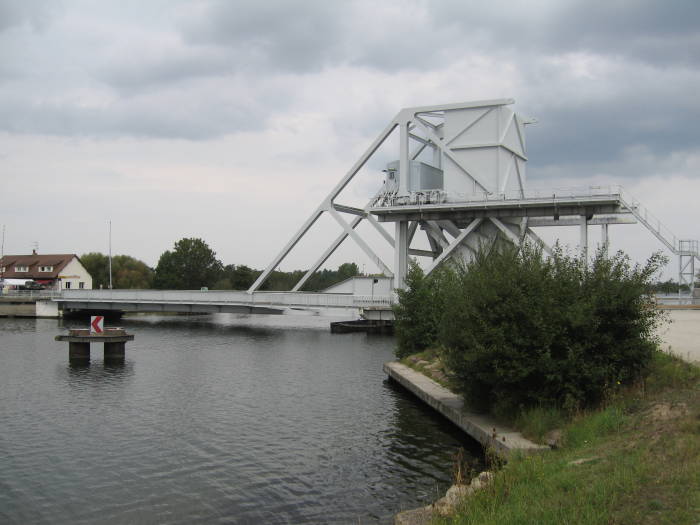
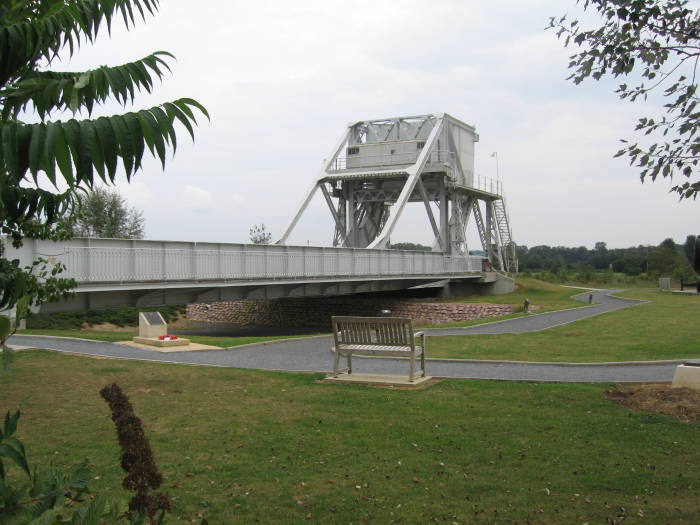
The canal is 46 meters wide. The bridge is of the design called a rolling bascule bridge, raised with the help of a large concrete counterweight to allow shipping to pass through the canal. Normally the bridge span lies very close to the water level in the canal, as you see here.
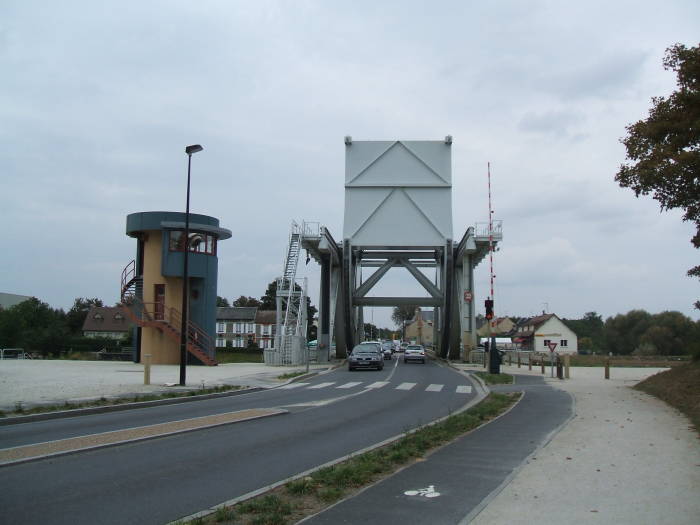
Pegasus Bridge, over the Caen Canal. The tower is staffed by operators who open the bridge for canal traffic. We're looking west, from between the two bridges and across the canal bridge.
Fifty men of the German 736th Grenadier Regiment, 716th Infantry Division defended the bridge. The Division's eight battalions were deployed along 34 kilometers of Germany's defensive Atlantic Wall. The regiment at the bridges was a static one, deployed to Normandy for two years at that point.
Pegasus Bridge and the former home of the Gondrée family, the first home liberated in the D-Day landings. A young daughter at the time now runs the café in the house.
The regiment was poorly equipped and poorly manned. The men were conscripts from Poland, Russia and France, armed with a mix of foreign weapons and commanded by a German officer and senior non-commissioned officers. The commander was ordered to hold the bridges if possible, but destroy them if they were in danger of capture.
There were three machine-gun emplacements on the west bank of the canal, the far side in the picture above, and a machine gun and anti-tank gun on the east bank, near the bridge's control station and the lift mechanism. There was a concrete pillbox and three machine guns north of the bridge, and an anti-aircraft tower with machine guns to its south. The Orne River bridge, just 500 meters to the east, had similar defenses.
The Gondrée family operated a café and lived upstairs in the building at the west end of the canal bridge. Gondrée family members still own and operate the café at the end of the bridge.
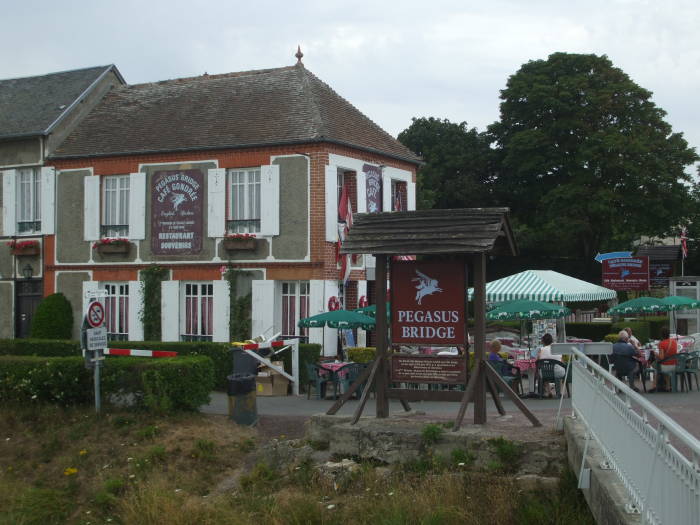
Café Gondrée at the west end of Pegasus Bridge.
The Gondrée family was involved in gathering intelligence, they were very well situated to observe German preparations. Since the war the café has been a rendezvous point for veterans visiting the battle site.
Six Handley Page Halifax bombers started towing the gliders out of the southern England RAF base at 22:56 on the 5th, carrying the assault force of 181 men. They crossed the Channel at 7,000 feet, crossing the Normandy coast and releasing the gliders at 00:07 on the 6th.
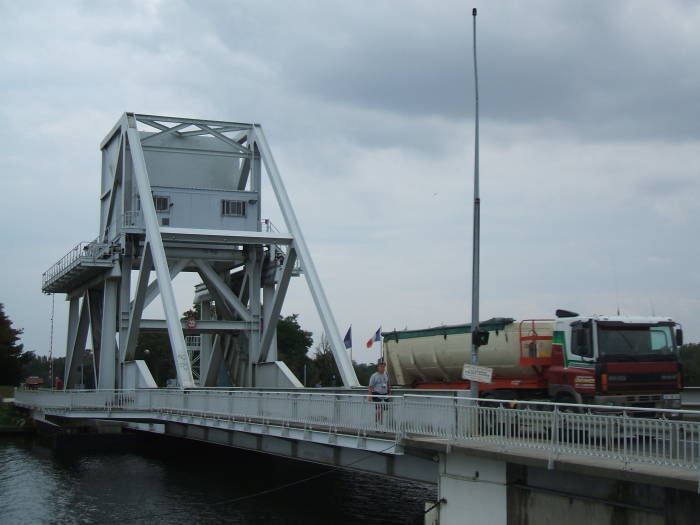
Traffic on the Pegasus Bridge.
The first glider crash landed into the defensive wire around the bridge at 00:16. It struck an earthen bank, throwing the pilot and co-pilot through the windscreen and stunning their passengers. All of the landings were really barely-controlled crashes, with a parachute deployed from the rear of the glider shortly before landing to slow its speed.
The other gliders arrived at one-minute intervals. The second swerved at the last moment to avoid hitting the first and broke in two as a result. The third skidded into a pond.
The narrow strip between the river and the canal is largely marshland, the gliders were crashing into water and soft soil. The gliders were crashing within about fifty meters of the bridge, but the implausibility of gliders being landed with such precision in darkness led the defenders to assume that the sounds were from a bomber crash in the distance. They were surprised when the British formed up and attacked.
Pathfinders from the 22nd Independent Parachute Company landed between the canal and the river at 00:19
There was a firefight, but by 00:21 German resistance on the west bank of the canal had ended.
At 00:50 British aircraft arrived overhead carrying the 6th Airborne Division, who parachuted into the drop zone near the bridge.
The commander of the German 716th Infantry Division was informed at 01:20 that the Allied had captured both bridges intact. He ordered that tanks of the 21st Panzer Division attack the landing areas, but all German Panzer formations could only be moved on the direct orders of Adolf Hitler. Hitler was sleeping and his staff refused to wake him.
The landings at Sword Beach began at 07:00. The men who had arrived by glider and parachute and seized the bridges managed to hold on until larger units made their way inland from the British and Canadian landings. The airborne troops heard bagpipes approaching at 13:30.
The British Army's 1st Special Service Brigade, renamed later that year as the 1st Commando Brigade, had arrived from the landing beaches, followed by some tanks. They reinforced the Allied positions around the bridges and moved into Bénouville and surrounding areas.
The men who had flown and jumped in to seize the bridges turned them over to larger units around midnight on the 6th.
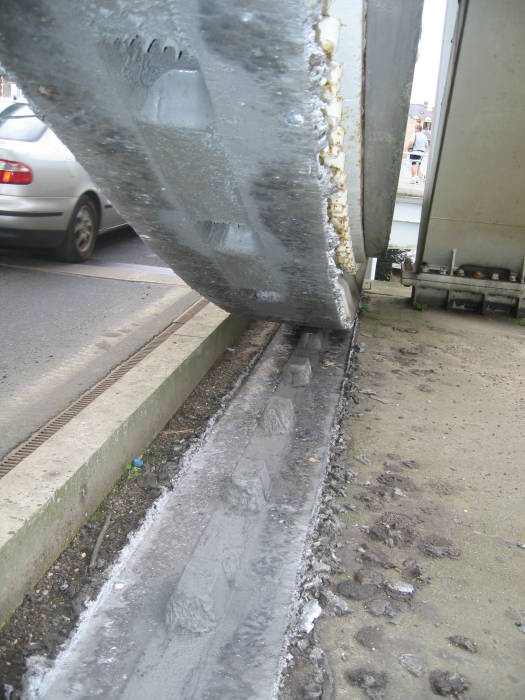
Pegasus Bridge mechanism.
You can see why it's called a rolling bascule bridge. A large partial wheel engages a cog strip to pivot the bridge up out of the way of canal traffic. A large concrete-filled counterweight box helps to lift the span. Copious amounts of white lithium grease keeps things moving smoothly.
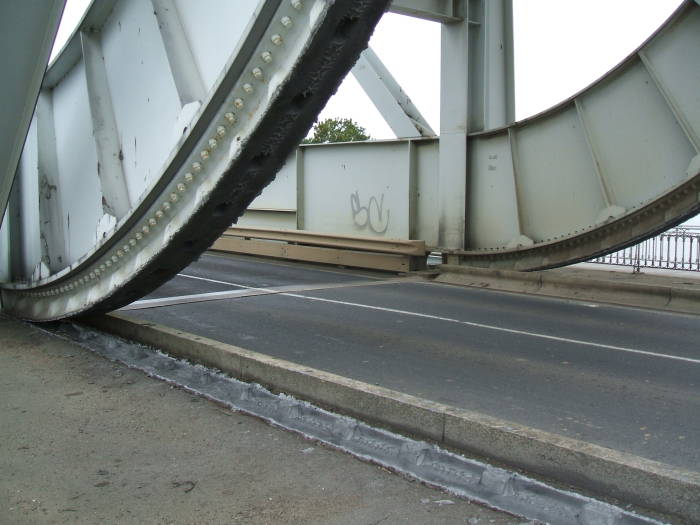
Pegasus Bridge mechanism.
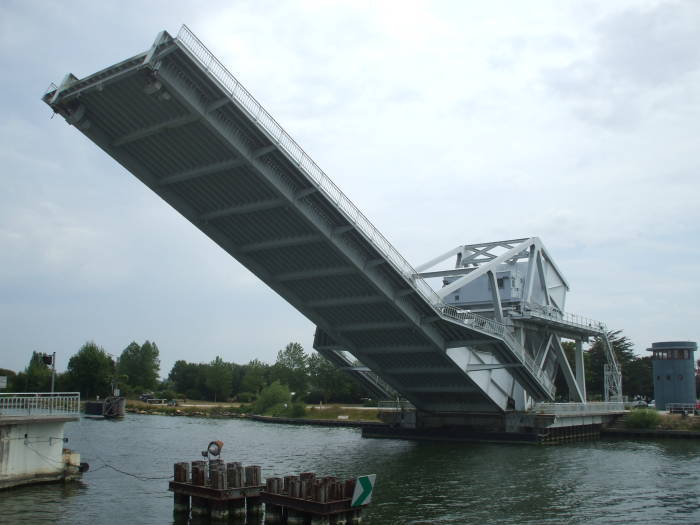
Pegasus Bridge raised to allow canal traffic to pass.
Pegasus Bridge as seen from the area where the gliders crash-landed.
That's what happened at Pegasus Bridge in June 1944. As for the bridge itself....
The original bridge was replaced in 1994 with one about 50% larger, in order to handle the increased traffic. This was controversial, as the local people needed better infrastructure but they didn't want to lose the memorial to the events of 1944. So the replacement was built to the same design, just scaled up. And the original bridge was moved to a nearby memorial park, seen from above in this scan of a postcard.
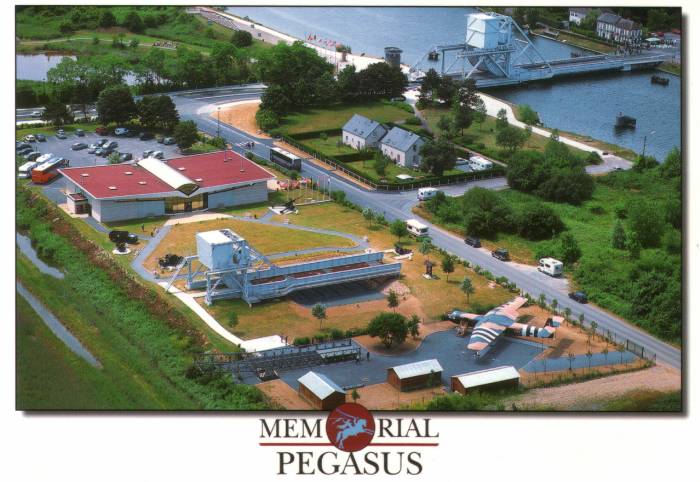
Pegasus Bridge as seen on a postcard.
There's a museum, in the red-roofed building, and a fenced in park where you can walk across the original bridge and see a restored Horsa glider.
The Gondrée family home is at upper right on that postcard, just beyond the lifting end of the new bridge. The gliders crash-landed in the swampy area between the bridge mechanism and the small pond at upper left.
The original Pegasus Bridge.
The Airspeed AS.51 Horsa glider is named for a figure of Anglo-Saxon legend, one of two Germanic brothers who led the Angle, Saxon, and Jutish tribes who first conquered parts of southern Britain in the 5th century AD.
The initial plan had been for the glider to be towed over a battlefield so that paratroopers could jump from the gliders. This plan was changed, so the glider would actually land and deploy the troops. There had also been plans for a while for the Horsa to carry bombs.
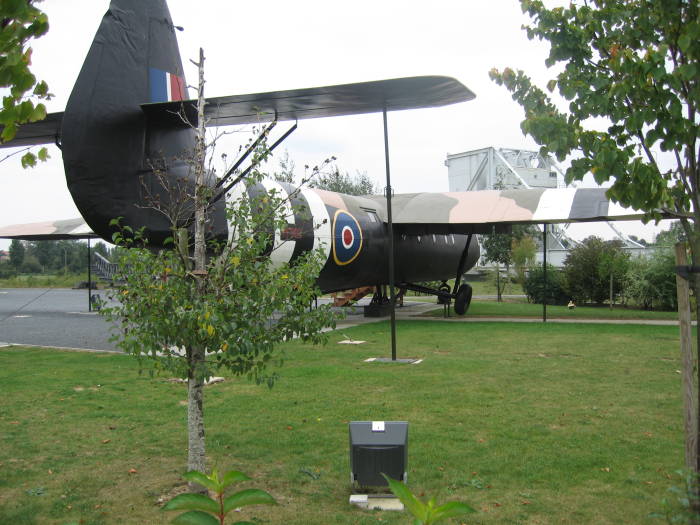
A restored Horsa glider, with the original Pegasus Bridge in the background.
The Horsa was sturdy and maneuverable as gliders go. Its large flaps allowed for a steep, high rate-of-descent landing, supporting operations with extremely small landing areas like the one at Pegasus Bridge. It was built from wood, with an 88-foot wingspan. It had tricycle landing gear for takeoff. The landing gear would be jettisoned on operational flights, with landing on the freely steering (or castoring) nose wheel and a spring-mounted skid under the fuselage.
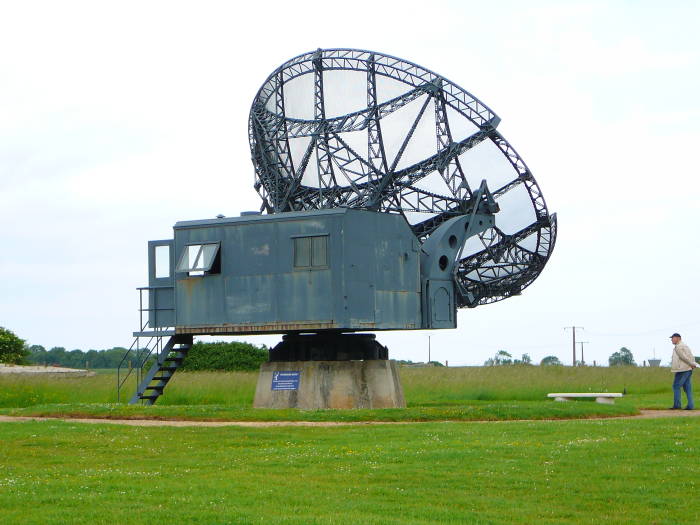
Würzburg Radar near Douvres-la-Délivrande
The Würzburg radar was the primary ground-based gun-laying radar for the German air force and army during the war. About 4,000 Würzburg systems were built and deployed by the German military.
Würzburg Radar at Fécamp on the Normandy CoastDr Wilhelm Runge, Telefunken's director of research, had dismissed the idea of early warning radar as science fiction in 1934. Developers of German radar systems up to that point formed GEMA, Gesellschaft für Elektroakustische und Mechanische Apparate and later collaborated with Lorenz.
GEMA's successes made it clear to Runge within about a year that radar was practical after all, so he started a crash program to try to catch up. GEMA and Lorenz seemed to have the early warning market cornered, so Runge's Telefunken group concentrated on short-range gun-laying systems. The Luftwaffe awarded a full development contract late in 1938.
Telefunken's system was known as the FuMG 62. It was based on a klystron microwave tube operating in the range of 54-53 centimeters, or 553-566 MHz, with a pulse length of 2 microseconds and a pulse repetition frequency of 3,750 pulses per second. This was an extremely short wavelength for the time, especially for its power level of 7 to 11 kilowatts. Its three meter parabolic dish antenna gave it a maximum range of about 29 kilometers, and it had a range accuracy of about 25 meters. Angular accuracy of the Würzburg D model was about 2° in azimuth and 3° in elevation.
A museum outside Douvres-la-Délivrande is based around a Würzburg radar station.
The FuMG 62 angular accuracy of 2°×3° was inadequate for direct control of anti-aircraft guns. The FuMG 65 Würzburg-Riese or "Würzburg Giant" was developed to try to overcome this shortcoming. Its antenna was enlarged to a 7.4 meter dish and the transmitter power was increased. This yielded a range of up to 70 kilometers, requiring the that PRF be decreased to 1,875 pulses per second. Angular accuracy was improved to 0.2° in azimuth and 0.1° in elevation, more than adequate for direct gun control.
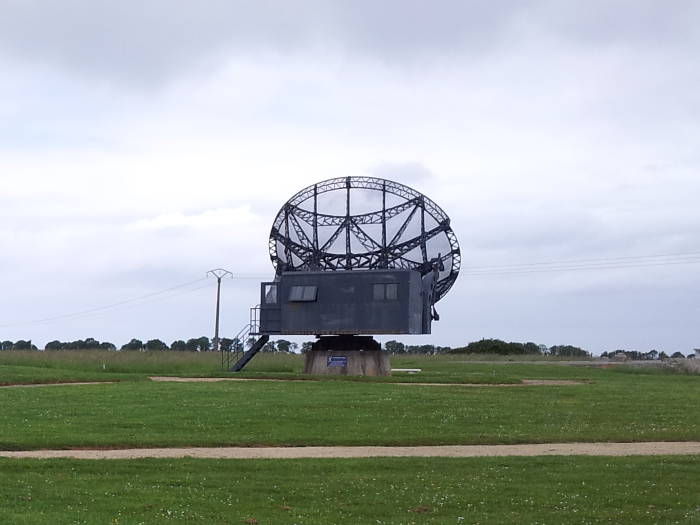
Würzburg radar at Douvres-la-Délivrande.
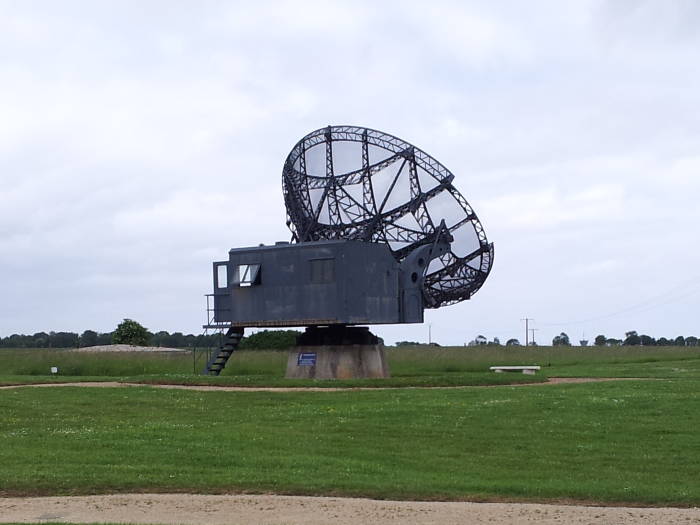
Würzburg radar at Douvres-la-Délivrande.
Würzburg radar at Douvres-la-Délivrande.
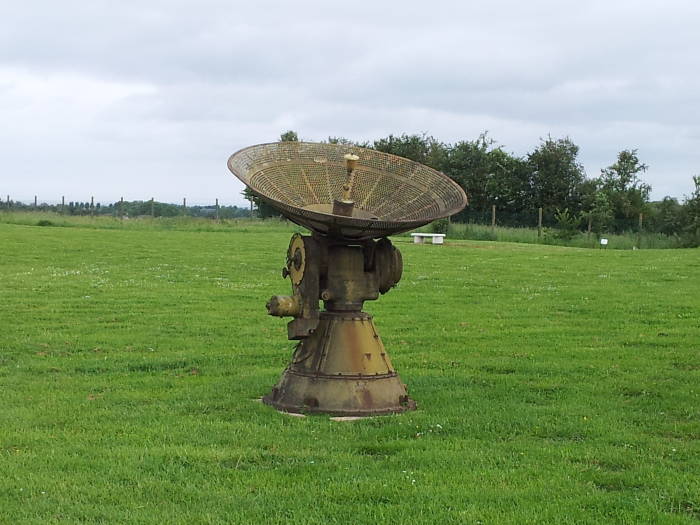
Small radar at Douvres-la-Délivrande.
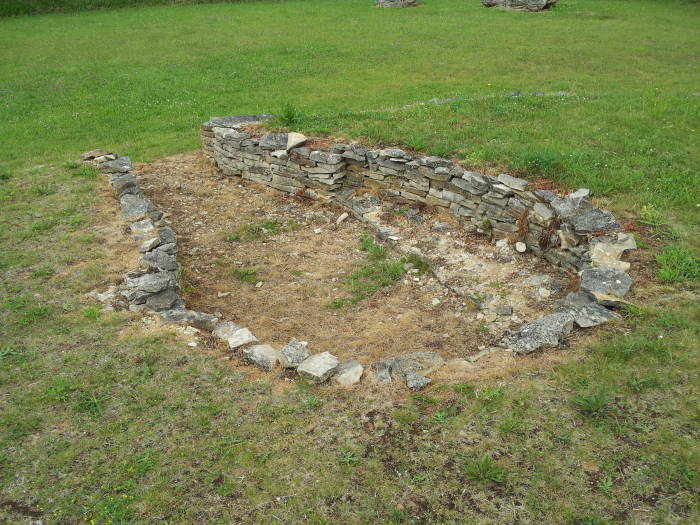
Pierre Tourneresse, a Neolithic Passage Grave
Pierre Tournesse is a megalithic structure dating back to 3,900 B.C. in the Neolithic era. It is a passage grave, a dolmen style of burial structure accessed through a tunnel with the entire structure originally buried under a mound of earth. It's on the north edge of the small town of Cairon, northwest of Caen.
The overall structure is nearly circular, about 24 meters in diameter. It was buried in a mound mostly of earth with some stones, with its outer surface covered with stones.
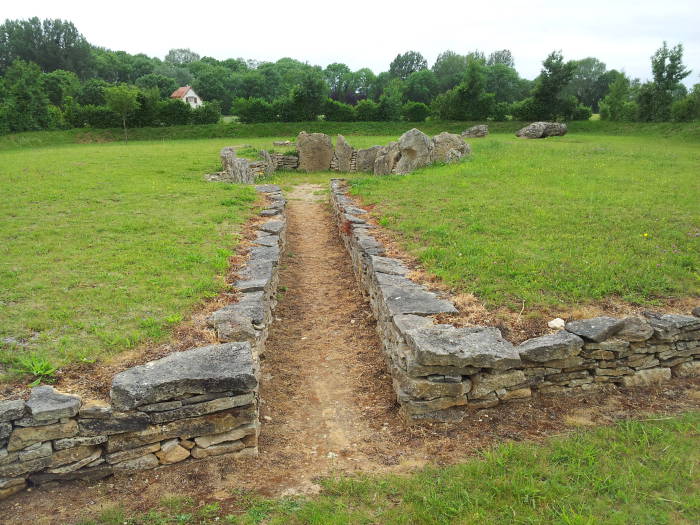
Entry tunnel to main chamber of the Pierre Tourneresse passage grave.
The long access passage is aligned to 100°, just a little south of due east. The orientation may have been meaningful to the builders, with the sunrise shining down the passage on an auspicious day of the year. No one knows, this was a truly prehistoric era and so we have no recorded information about their beliefs.
The central chamber, close to the center of the structure, is about five by three meters in size. It was built as a dolmen with rows of large slabs and some drystone forming the walls and truly megalithic cover stones as a roof. The central chamber was accessed by an access tunnel almost nine meters long and less than a meter wide and tall.
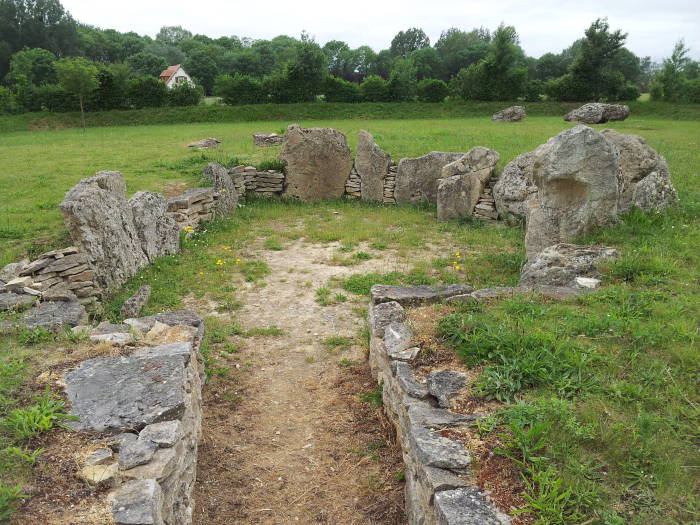
Main chamber, where remains of at least twelve individuals from 3,900—3,700 B.C. were found.
A smaller chamber, about three by two meters, is almost directly connected to the exterior through an entrance on the opposite side from the long passage. A child's body was buried there, wearing a pendant made from a pierced dog's tooth.
Secondary chamber, where a child had been buried with a dog-tooth pendant.
Tourneresse
The remains of at least twelve individuals were found in the central burial chamber. Carbon-14 dating on these remains allowed the dating of the structure to 3,900—3,700 B.C.
The Germans had used the site as a gun emplacement and shelter during World War II, using the exposed capstones as part of that. They destroyed their site as they withdrew in June, 1944, damaging the capstones in the process. Until then, the capstones were complete. The Nazis and self-rotating megaliths make this sound like a case for the Bureau for Paranormal Research and Defense.
The Calvados département has a number of megalith sites, many of them individual stones called menhirs especially in the case of tall standing stones. Many of them share a common legend about a large stone that can turn itself over. The name of this structure literally means "The Turning Stone" as tourner is French for turn. All that was visible and known about in historic time was the top of one or more of the capstones, and this was said to be one of the "turning stones".
Access is quite easy if you have planned ahead and have a decent map. The 1:200,000 Michelin map can get you to Cairon easily. The excellent 1:25,000 map from the Institute National de l'Information Géographique et Forestière gives detail down to individual buildings. The site is at:
		49°14'06" (49.2350°) N
			 0°26'29" ( 0.4414°) W
See the dedicated page for more details on Pierre Tourneresse and how to get there.