Defining the App
Social Media Apps and Credentials
You sign in to Mastodon or Twitter in either a web browser or a smart phone app using an email address and a password. That puts you into the human user interface, where you can scroll through the feed, "favourite" or "like" a post, "boost" or "retweet" a post, reply to a post, or create and upload your own post. Or at least that's the situation during an interactive session.
Looking deeper,
after submitting a valid identity (email address)
and password,
the server directs your browser to a new page while sending
a small piece of data called a cookie.
The browser stores the cookie and
associates it with the server that provided it.
Or, the cookie content could specify that it's for a domain
such as .example.com or similar.
The rules include:
- The browser should include the cookie in all subsequent requests to that same server or domain.
- The browser must not send the cookie to any other server or domain.
-
The cookie may contain
an expiration date and time.
- If so, the browser will delete the cookie from its storage when the expiration date and time arrive.
- When the browser starts, it reads through its list of stored cookies and deletes all those whose expiration times have passed while the browser was not running. A starting browser also deletes all cookies without expiration times. That makes them so-called "session cookies", valid only during one running browser session. You must completely terminate the browser, closing all tabs and all windows, to get this start-up behavior.
That behavior is desired for interactive social media sessions in a browser or smart phone app. But for automated posting, we want rather different behavior.
My automated posting program uses an API or Application Programming Interface built around a REST or Representational State Transfer model.
What that jargon means is that my program will connect to the server with HTTPS, and then send requests and receive data or at least numeric return codes, just as a browser does. But unlike a browser, the point is not to receive data in order to render and display web pages.
Cookies aren't used. Each action makes a connection that carries authentication information, makes a request, retrieves the result, and disconnects.
Set Up Mastodon Apps and Credentials
This is very easy:
- Use a browser to log in to your Mastodon account.
- Click Edit Profile.
- On the left side, click Development.
- At upper right, click New application.
- Enter a name in the Application name field. Leave everything else on this screen as it is.
- Scroll to the bottom and click Submit.
- This takes you back to what should now be a list with one entry, your new application. Notice that it shows read write follow under "Scopes". Click on the name of your new app.
- You will see a list of Client key, Client secret, Your access token. Copy this data to somewhere safe.
All we really need is the access token, which will look something like this:
Client key           mqrEzrv5QHRg+MAzUlK8PvB5t/s8SmfFZeEgmrN0xKb
Client secret        ultv9ND0Hx5Sks8fwfO05eaQRoDs+mhv/GaEwWLic9t
Your access token    fTi/KwMnvY+wD6zSi733JtgImn0xeMwEXWDEI1aVo2C
Set Up Twitter Apps and Credentials
Setting up an app on Twitter is similar to the process on Mastodon, but a little more complicated.
Sign into Twitter, start creating a new application
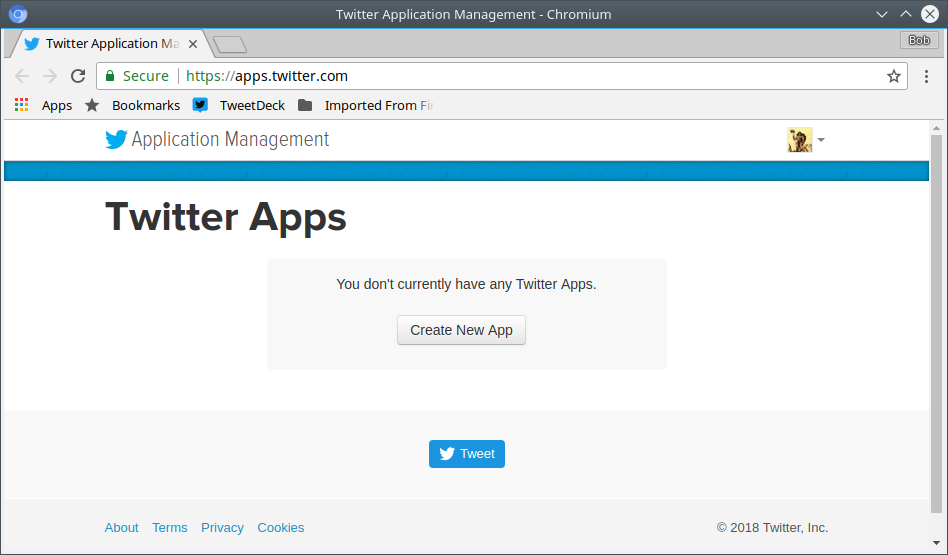
Start by signing into Twitter.
Then go to the page apps.twitter.com and click on Create New App.
Start an editor session in a terminal window, you will need to copy and paste a few cryptic strings into there. They're needed for later programming steps.
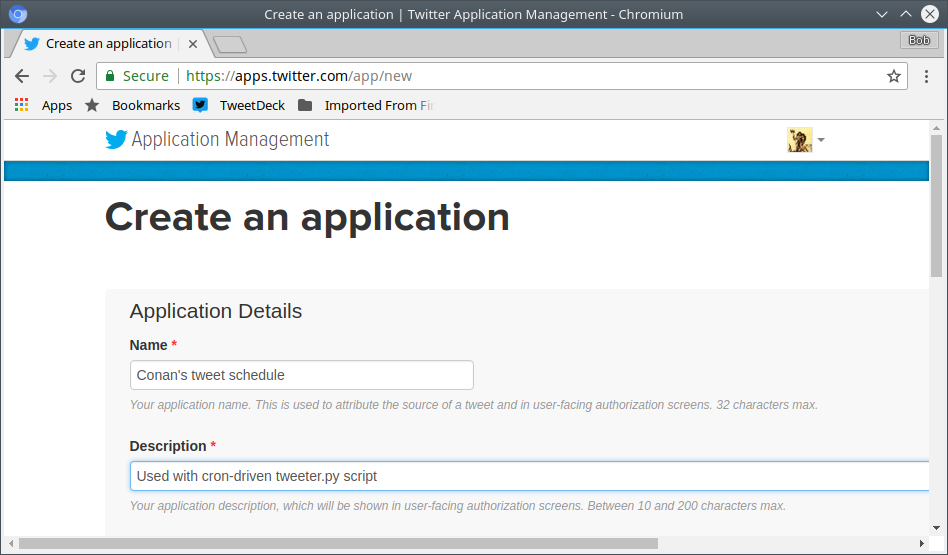
Name and description
Specify a name and a description for the application. This is intended to make it easier for you keep track of things once you have created dozens or hundreds or even thousands of applications.
"My Tweet scheduler" would be fine for both fields here.
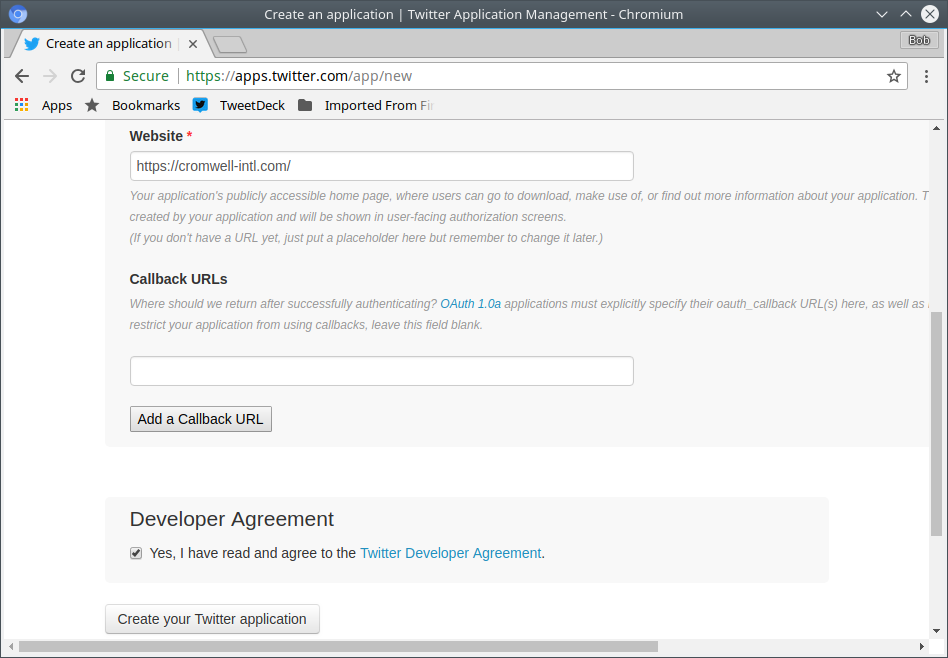
Website and Callback URLs
Since we aren't really creating an application for users, the website URL doesn't really matter. Neither does the callback URL list, which I will leave blank.
Click the box to agree to the Twitter Developer Agreement.
Then click the button to create the application.
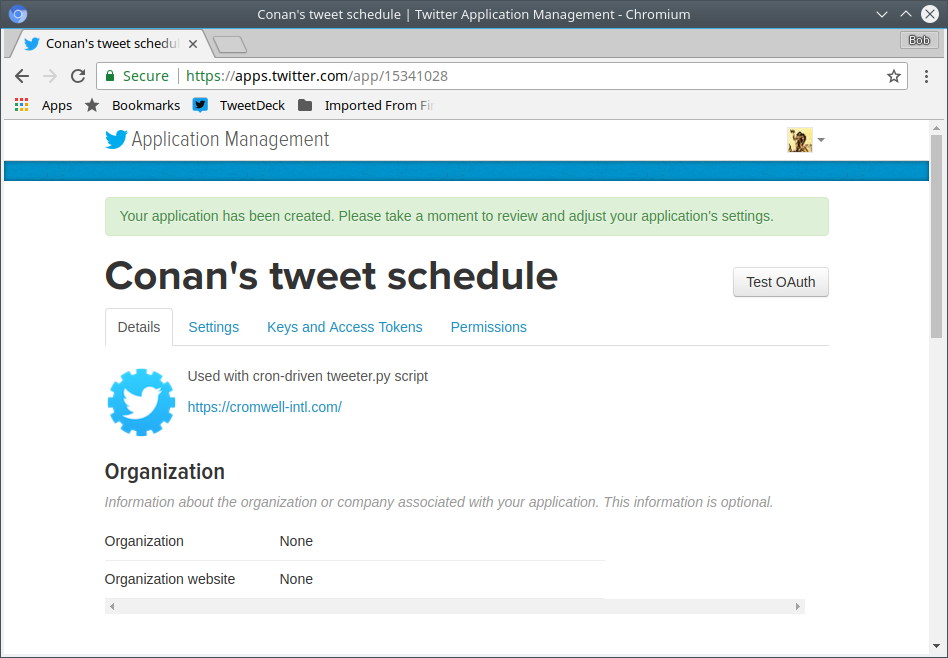
Application Details
Congratulations, you have created a Twitter application!
Notice that this page has four tabs, Details, Settings, Keys and Access Tokens, and Permissions. We clicked on the button to create the app on the previous screen, that took us to the Details tab.
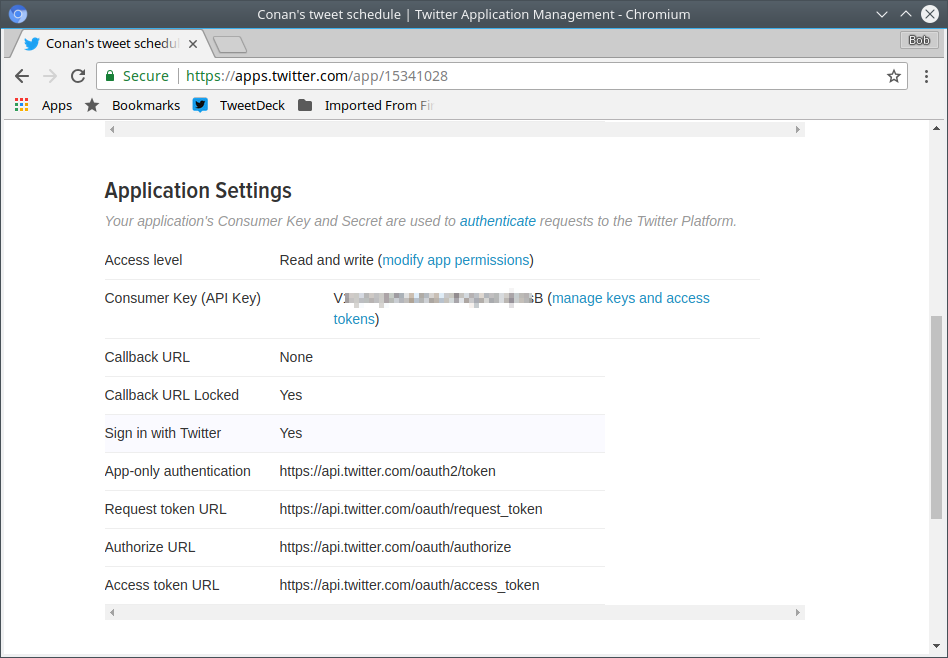
Application Settings
Click the Settings tab.
Copy and paste the Consumer Key, also called the API Key, from the browser into a text file. The Consumer Key is a 25-character mixed-case alphanumeric string. Also paste the name, "API KEY", into place. There are a few of these cryptic strings, you have to keep track of which one is which.
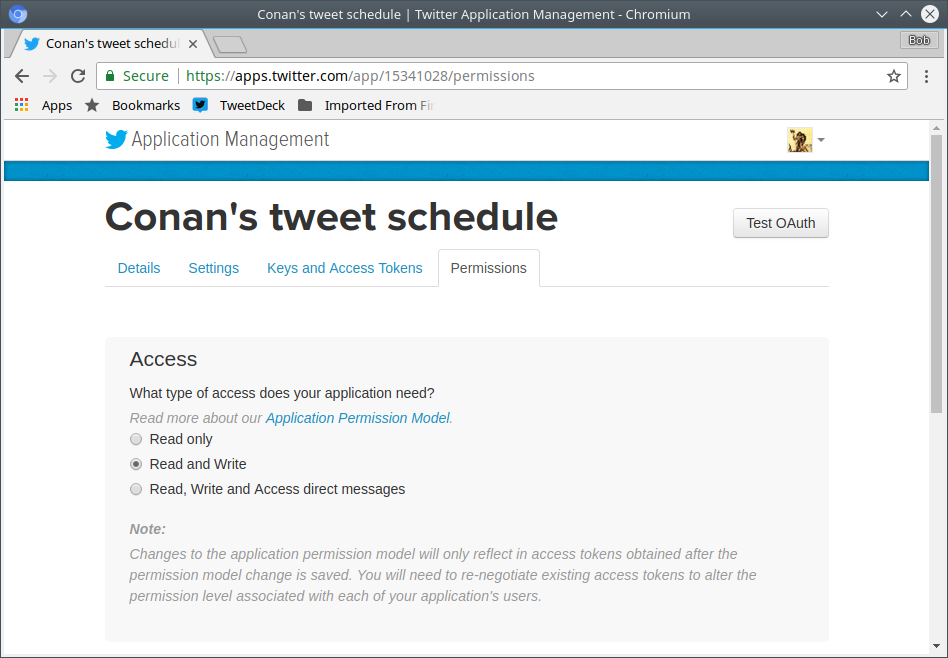
Application Permissions
Scroll back up and click the Permissions tab.
We want to upload image files and post text status updates. Make sure that access is set to Read and Write.
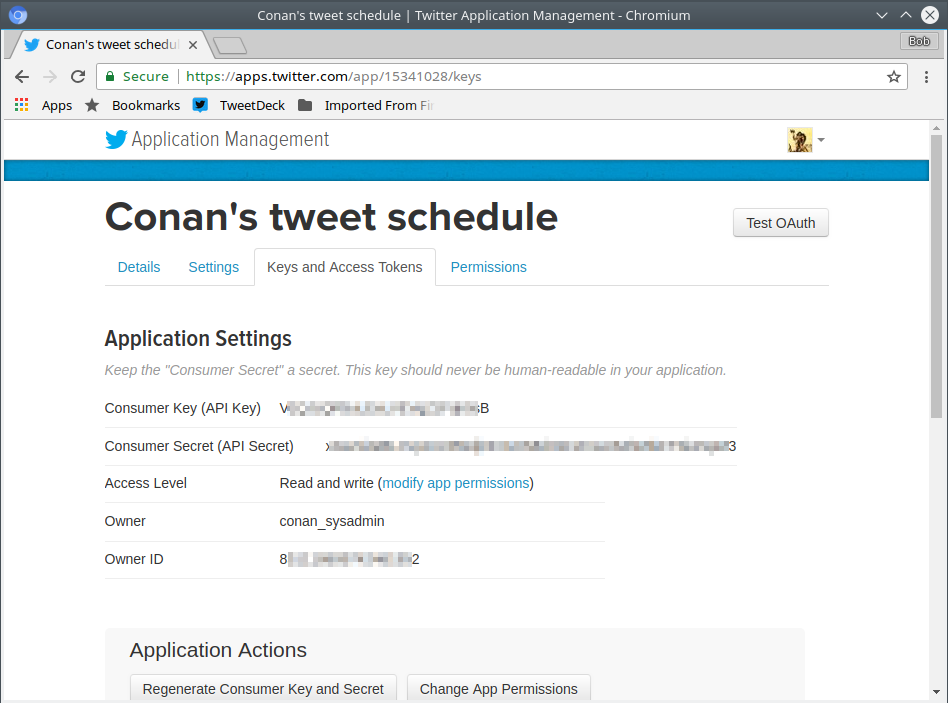
Consumer Key and API Secret
Click on the Keys and Access Tokens tab.
The Consumer Key or API Key appears again on this screen.
Copy and paste the Consumer Secret, also called the API Secret, from the browser into a text file along with the Owner ID.
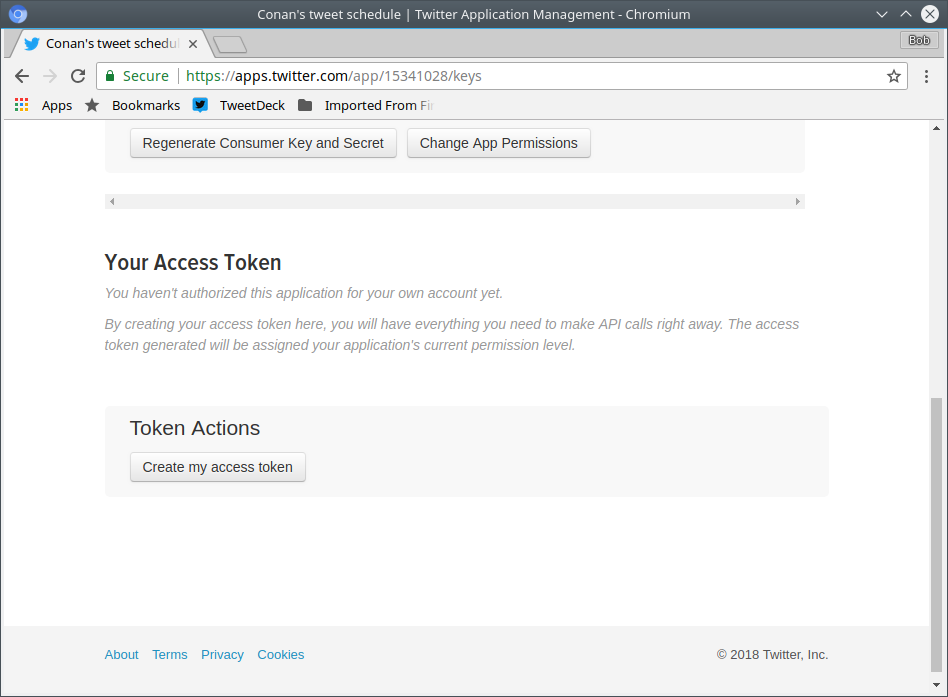
Creating the Access Token
Scroll further down the page.
Click the button Create my access token.
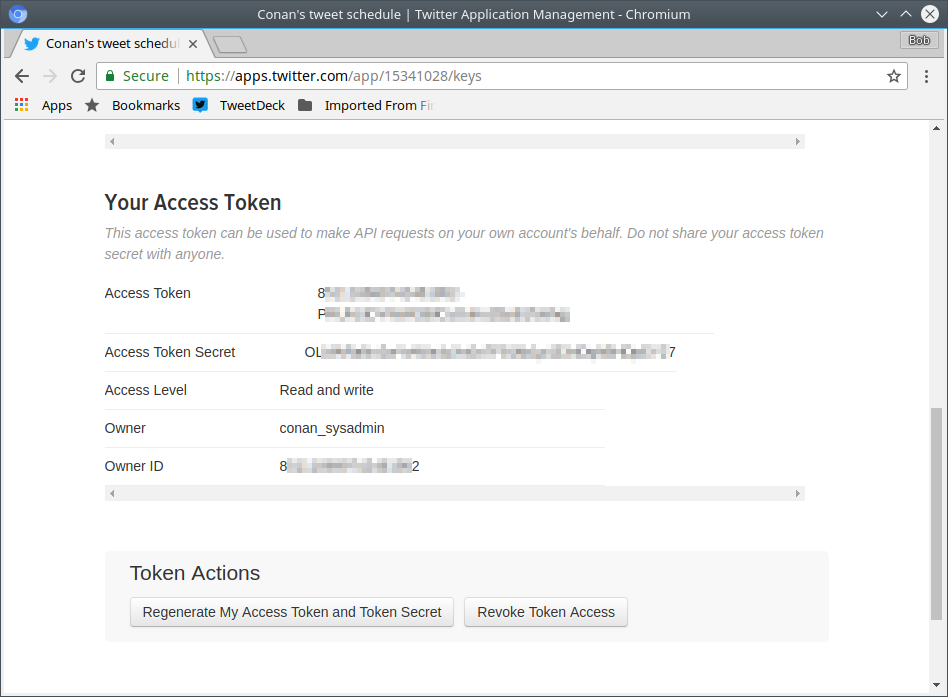
Access Token and Access Token Secret
Copy and paste the Access Token and the Access Token Secret from the browser into that same small text file.
Checklist
You have defined an app within Twitter, and you should have a record of:
- Owner name (Twitter identity)
- Owner ID
- API Key
- API Secret
- Access Token
- Access Token Secret
Creating the Python Program
Make sure to protect the sensitive information collected in the above steps! Carefully configure the ownership and permissions of any file containing them, as access to that data provides full access and control of your social media identity.
Now you're ready to
copy and modify my Python program,
test it, and deploy it with cron.