Attempting to Repair Mitsumi 3" Quick Disk Drives and Recover Data from Media
Abandon Hope
We are going to try to recover data from some old Mitsumi Quick Disk media. The title provides a strong hint of how much success to really expect here....
The drives can be repaired, and almost certainly they will need to be repaired. But media problems make your data recovery chances very grim.
The bits very likely are no longer on the media, at least not at signal levels that can be recovered by Mitsumi Quick Disk hardware.
If you pulled the analog signal off the read heads and amplified that, then maybe you could recover the data. Encoded, of course, in a format not used in decades....
This is very reminiscent of the problem faced by the U.S. National Archives, as described in the article "Are We Losing Our Memory? Or: The Museum of Obsolete Technology", from Lost magazine.
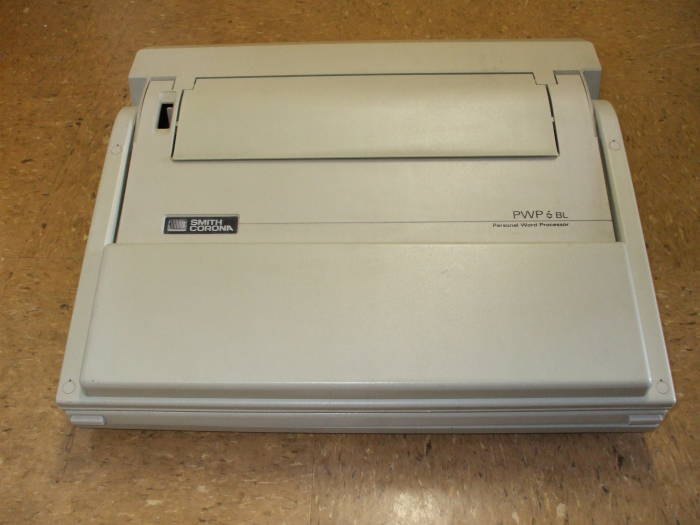
A friend asked if I could try to recover the data stored on the diskettes used by his Smith-Corona Personal Word Processor.
Maybe.
What is that?
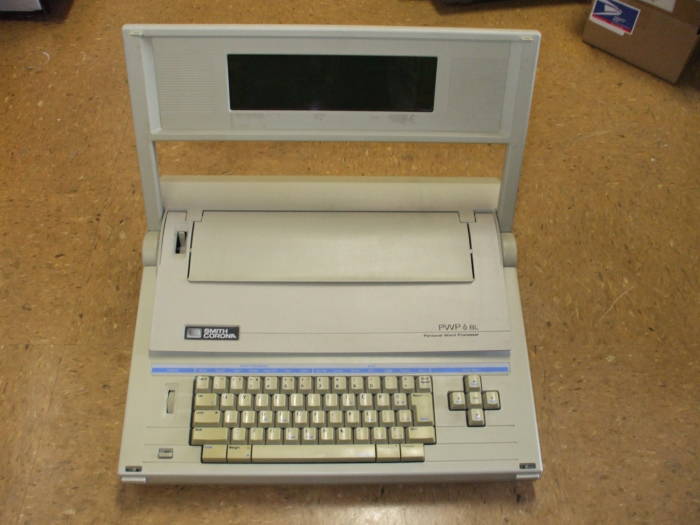
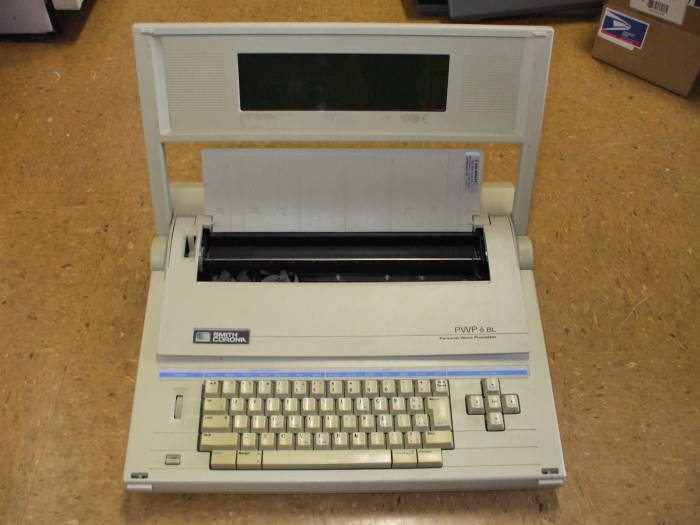
It was called a "word processor" back in the next-to-last decade of the 20th Century.
Now you would call this device an electric typewriter with memory.
Or perhaps a "boat anchor".
You type a document into volatile RAM and then store it onto diskettes. Later, you can load documents from the diskettes into RAM and modify them.
When you are pleased with the result, as seen in an LCD panel of something like 10 lines of dot-matrix-style display, you can print the document.
We're dealing with late 1980s technology here, in what is probably an early 1990s implementation.
OK, sure, how hard would it be to recover data?
I was thinking of using something like
the UNIX utility
dd
to
read the data off of the diskettes,
and then looking at the result with a hex editor.
Probably
hexdump
or even
strings
could extract the text file contents.
Then he could read that into a text editor.
No, that won't work at all...
The diskettes aren't the physical format used on Earth.
The Smith-Corona PWP and other designs based on it used the Mitsumi 3" Quick Disk media. It dates from 1985 and stored a whopping 128 to 256 kbytes per disk in a peculiar physical format. See Wikipedia's "Floppy Disk" article.
Apparently this is the same design that Nintendo used on their Famicon console sold only in Japan.
The Quick Disk media was also used... well... pretty much no where else. Mostly on these "word processors" from decades ago. It was used on a few musical instruments, including the Akai X7000 and some 1990s Roland samplers.
This is why professional data recovery companies either don't want to talk to you about this media, or else they charge truly heinous amounts.
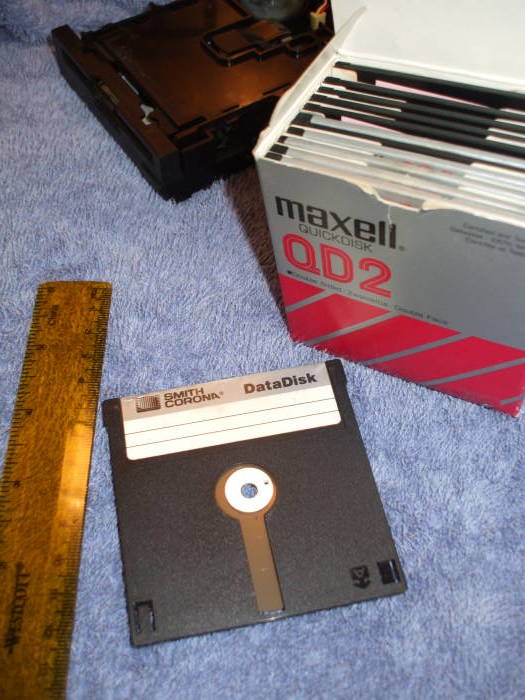
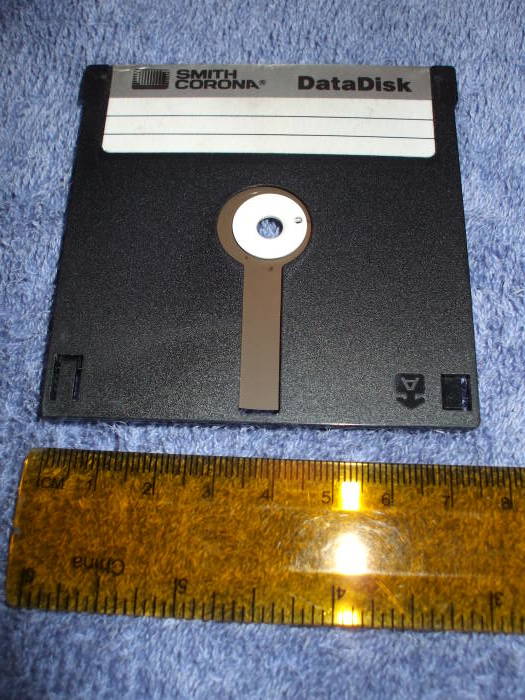
Here you can better see this arcane storage media. At first glance it appears to be just another diskette. But it's small with a rigid outer shell, like the common 3.5" later diskette design, with an exposed strip of magnetic media like the even older large and truly "floppy" diskettes.
Outer shell:
3 x 3.0625 x 0.125 inches
76 x 78 x 3 mm
Magnetic media:
2.8 inch / 72 mm diameter
Central hub 14 mm diameter with 4.5 mm central hole,
1 mm hole 5.5 mm from center for drive pin.
My friend's system did not work. It had not been used in a long time, and he said that the proprietary diskette drive "did not work".
What did that mean?
You could load a diskette, ask for a directory listing,
and after a while you get nothing back.
Just this message:
DRIVE READ ERROR
OK, let's try looking for a functioning PWP on eBay.
One eventually appeared. He ordered it, it showed up, and it failed in the same way. However, he was absolutely convinced that the media contained good data.
OK, maybe one of the drives can be repaired. We have two, so maybe the two systems can be Frankensteined together....
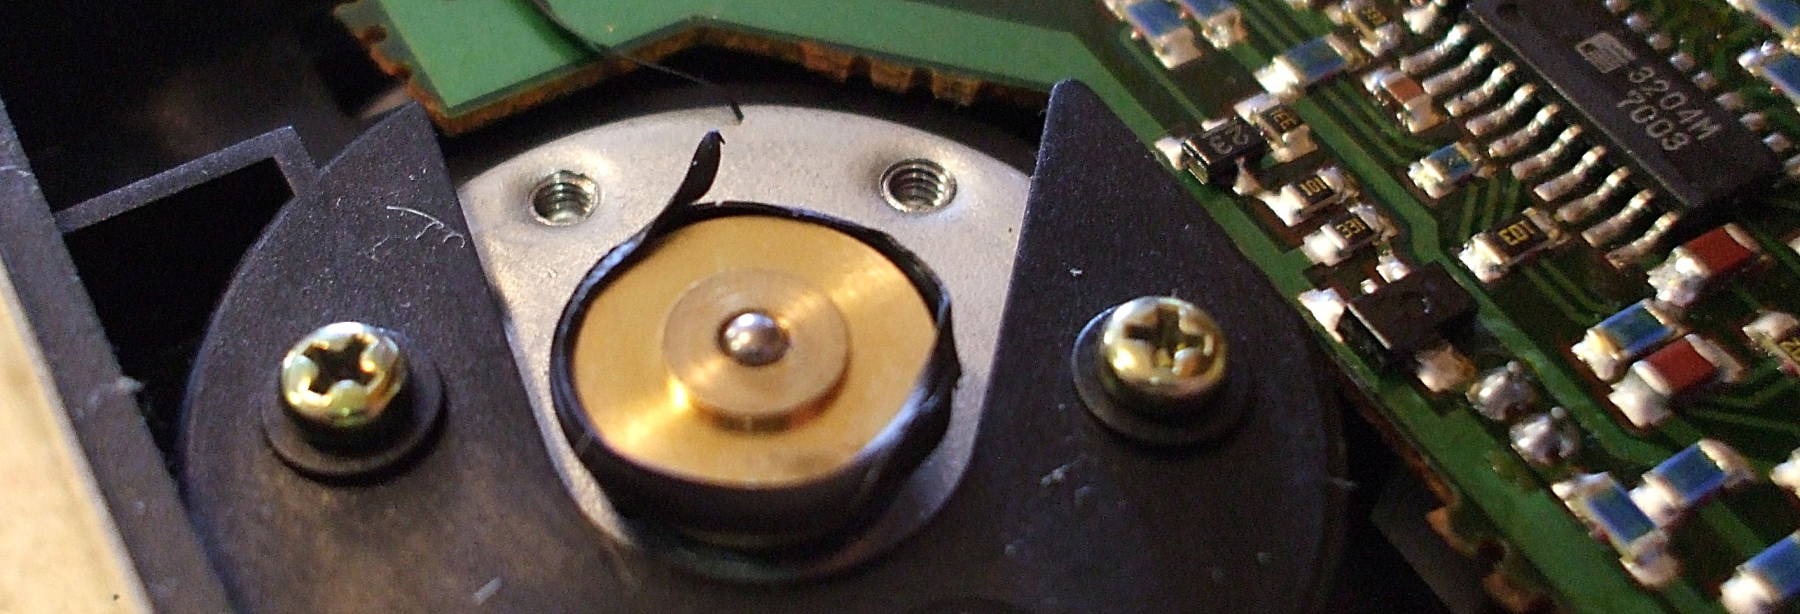
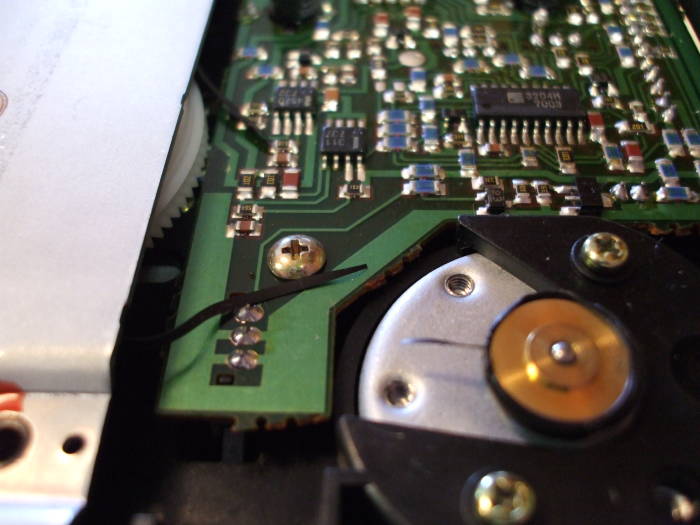
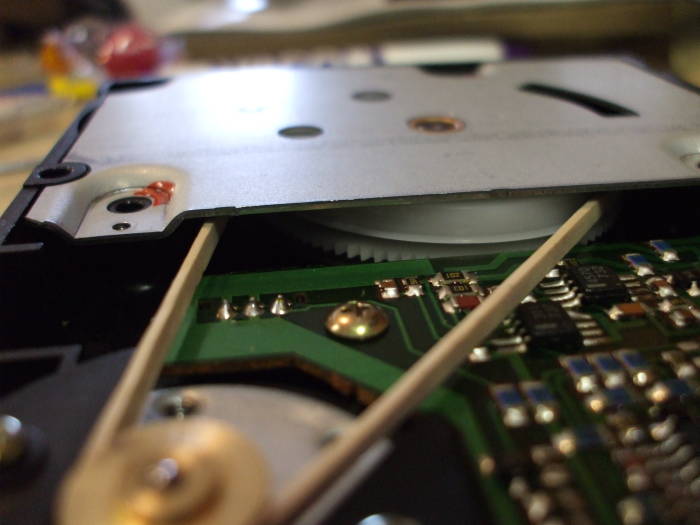
After quite a bit of disassembly, here is the diskette drive removed from one of the systems. Two layers of panels have been removed. The drive motor is at lower left, and the hub is the shaft in the bronze bushing near the center of the remaining panel above.
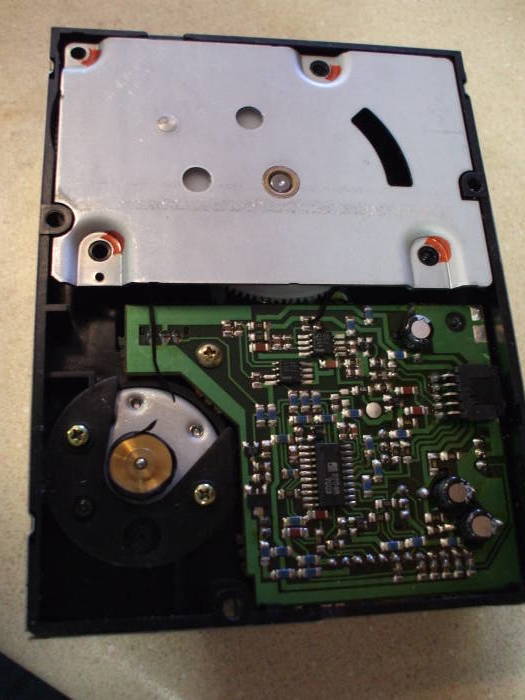
Hmmm. See what's missing?
No drive belt!
Well, there is a drive belt, or at least the curled fragments of one.
The drive belt had decayed. It was extremely soft, and attempts to pull it out from around the main pully caused it to smear into my fingers like thick grease.
OK, let's see what the other drive looks like.
Identical....
Based on a sample of just two, the common PWP failure mode seems to be a chemical breakdown of the diskette drive belt.
So you could find antiquated PWPs on eBay, but they will probably all be broken in the same way. You probably aren't going to find a working one, and you probably won't find the parts to Frankenstein one together because all of them will probably have no drive belt.
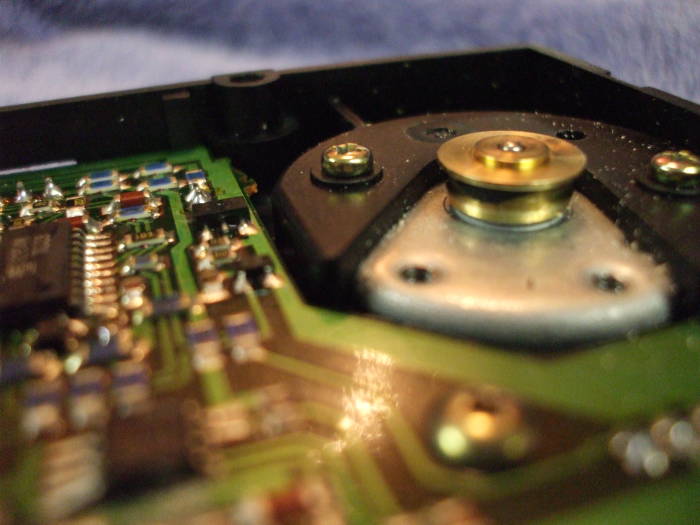
First, remove the belt fragments and clean up the brass pulley on the motor. A cotton swap soaked in alcohol was used to remove the formerly rubber goo.
At least the belt remains didn't stick to the nylon wheel.
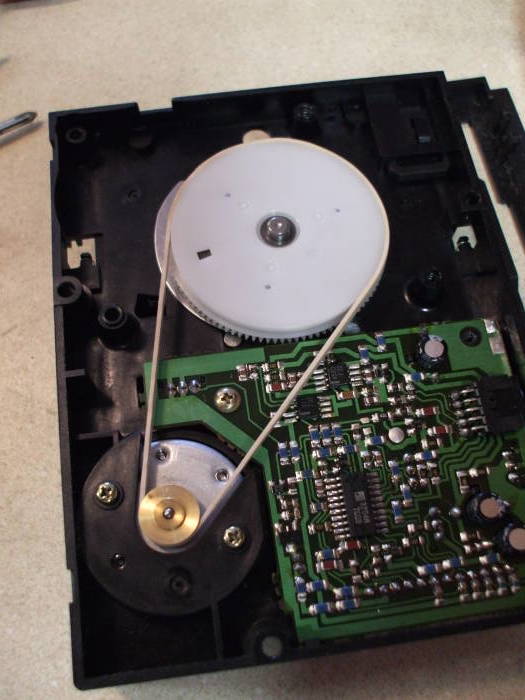
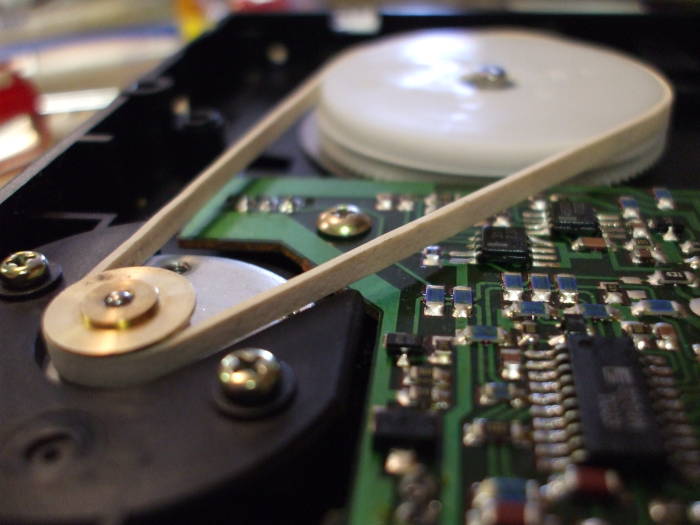
Next, replace the drive belt with a rubber band! (Or a "gum band" outside North America).
It took a little experimenting to select one that was fairly stiff and of appropriate dimensions.
Someone who found this page two and a half years after I wrote it said that you can order new drive belts from suppliers in Japan and China. A replacement belt for a Nintendo Famicon console is supposed to be of the same dimensions and material. So, Nintendo FDS owners, be ready for your drive belts to melt into goo.
You have to remove yet another cover plate, this one with an attached gear.
Once you have the replacement belt installed, you have to replace that plate while inserting the nylon gear appropriately.
During the course of the following operation you will have multiple opportunities to remove that plate, move the drive belt back into its proper position, and reassemble it.
So you will get practice in the reassembly....
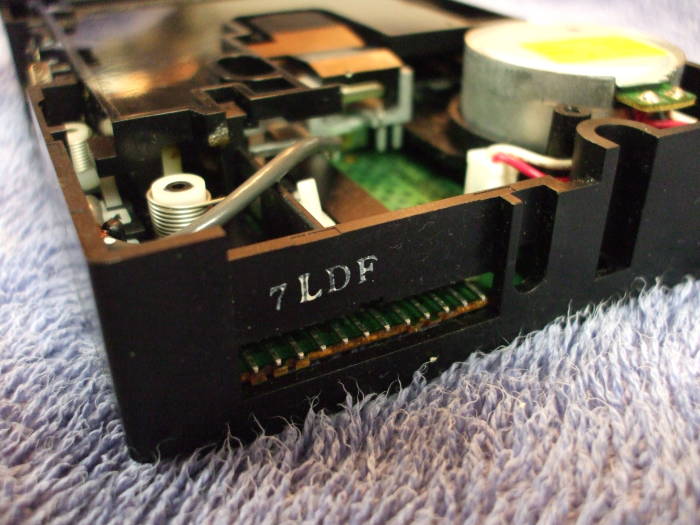
Before putting the major components back together, here is the other side of the diskette drive.

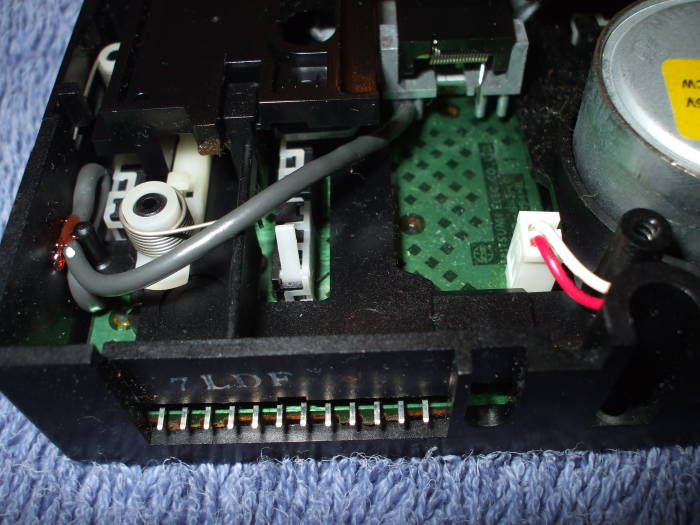
The connector is a series of pins on the main board of the drive.
At least on this example, the spacing of the pins above the board coupled with the shape of the connector on the small ribbon cable forces you to only attach the cable in the correct orientation.
However, it would be a very good idea to mark the cable before removing it. One of the PWPs had a drive ribbon cable with a dark wire at one end, easy to make a note if it was toward the edge or center of the drive.
The other did not, it had a bundle of black wires instead of a proper ribbon cable. But the connector could easily be marked.

You really don't want to reassemble the whole thing. You will have to fuss with the drive belt.
One thing that you will need to do on some PWP models is defeat a safety interlock so it will run with the case disassembled.
On this model the interlock is a microswitch to the rear of the left end of the main roller. I used a wire tie from a roll of garbage bags to hold that switch in place, tying it to the heat sink on the power supply in the left rear of the case.
Here it is ready to run. Yes, the top of my stove was a handy work area. I don't have any large table.
That's the diskette drive standing at a jaunty angle just behind the right end of the keyboard. Its normal position is laying flat in the bottom of the case.
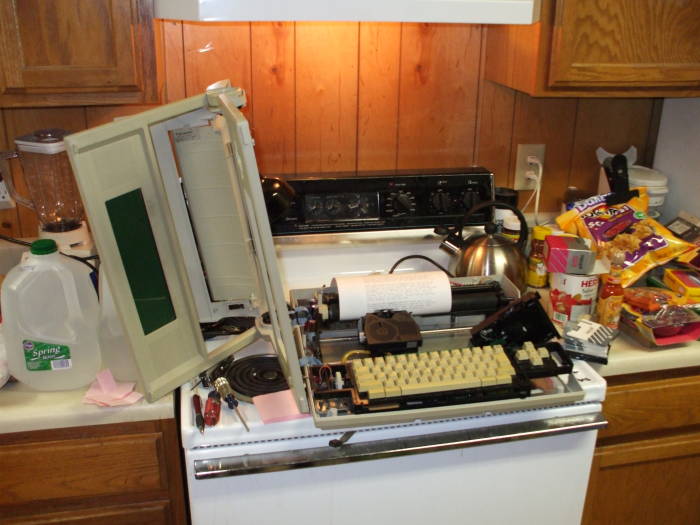
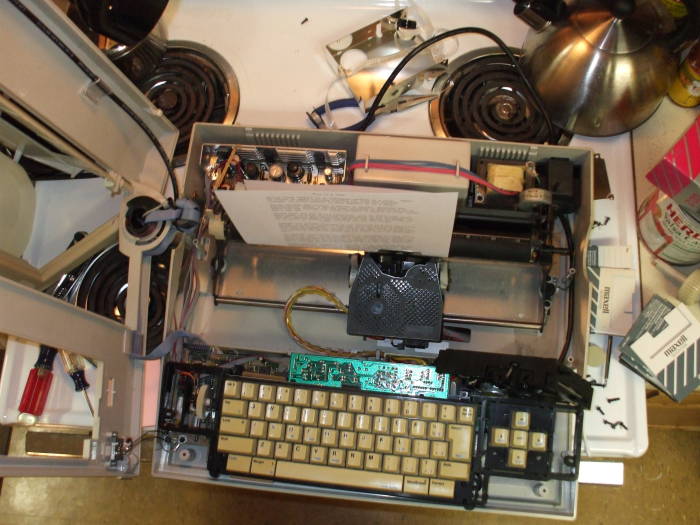
And, a view from above.
The teakettle is not a crucial part of this operation.
The large can of salsa served as a handy place to rest the stacks of diskettes.
After many attempts I found a diskette that had some recoverable data!
Here it is printing away!
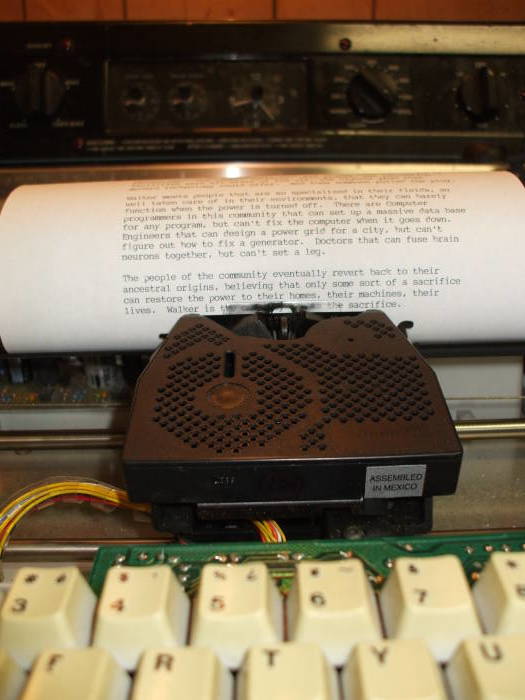
And of course, the ribbon ran out in the middle of the third page!
Luckily, the other PWP had enough ribbon to finish printing out what little data was recovered.
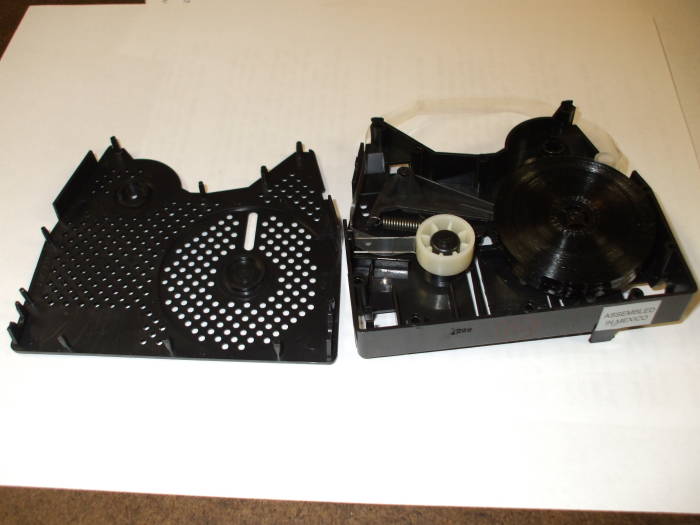
I found that you can pry the ribbon cartridge case open.
However, it would be very difficult to re-wind the ribbon back onto the source reel in a way that will feed cleanly and allow you to re-use the ribbon.
So, what was the result?
Almost all of the data had decayed off the media.
Even though I had kludged together a working drive, most of the media could no longer be read. Bit rot had set in.
There were 21 diskettes, all of them double-sided (and thus a whopping 256 kbytes of storage each). So, 42 pieces of media counting the two sides separately.
Out of those 42, on 30 I could not even read the
directory listing of the stored documents:
DRIVE READ ERROR
For the remaining 12, the directory listing
could give me a list of file names.
Not every time I tried, but with multiple read operations
I saw file names on these 12 pieces.
However, for 11 out of those 12,
none of the listed files could be read:
DRIVE READ ERROR
Finally, I was able to recover some of the data from one of the sides of one of the 21 diskettes. There were 8 files listed there. 5 of them could be read off the media into RAM and then printed. Of those five, one of them was largely corrupted (even on multiple readings).
So, out of 42 diskette sides, only 1 still had some recoverable data, and only half of the files on that one piece of media could be recovered.
What about the head alignment?
Yes, it's possible that the read head was mis-aligned and needed adjustment, but I don't think that was an issue:
- The ability to get directory listings or file contents was consistantly correlated with diskette sides. Ones that failed the directory listings always did so, and ones that allowed directory listings generally did so. Not 100% of the time, it would take multiple attempts to get it, but many more attempts on other diskettes did not yield directory listings.
- I tried some of the diskettes on both of the diskette drives and got the same results.
- As far as I know, my friend's PWP had been sitting quietly in a closet and was not subjected to any physical shocks or even motion. However, the above two correlations between media and errors, and the consistency across two drives, indicates to me that the problem is with the media.
I don't know how you would align the head anyway, because these drives don't work like relatively modern diskette drives.
The head does not seek to a fixed track on the media. That second gear under the removeable panel drives a cam at a small fraction of the media rotation speed. That cam moves the head through a fixed trajectory as the disk rotates.
Yes, the data seems to be stored in a helical pattern. Or else the tracks are circular but they are read by the head following a helical track.
Either of those suggests that the track is relatively broad with even broader dead space between. And so head alignment isn't going to be much of an issue.
What else could be tried?
Pull the signal off the read head, run it through a buffer amplifier, and capture it with an adequately fast analog-to-digital convertor. It wouldn't have to be very fast. Then do some DSP analysis on the resulting data.
Along the way you will have to reverse-engineer the data storage format, including the character encoding. I doubt that it's ASCII or EBCDIC, it's probably some bizarre format proprietary to Smith-Corona.
Then find the meta-data presented as the directory listing, and then use that to find the file data itself.
What about going deeper?
As I mentioned above, someone with Quick Disk experience found this page a year or so after I wrote it. They said that you can order new drive belts from suppliers in Japan and China, a replacement belt for a Nintendo Famicon console using the FDS or Famicon Disk System is supposed to be of the same dimensions and material.
He wrote, "I also note that your belt does not look like a Mitsumi drive belt, and the drives really have no tolerance for differing belt dimensions: they absolutely require the correct belt to ensure correct tension between the spindle and drive motor." Well, sure, as this page clearly states, I used a rubber band. But as it turns out, that can work — see the above pictures of the PWP printing files.
The number of files on the disk is recorded in block 02 on FDS, and the file index is in the next few blocks.
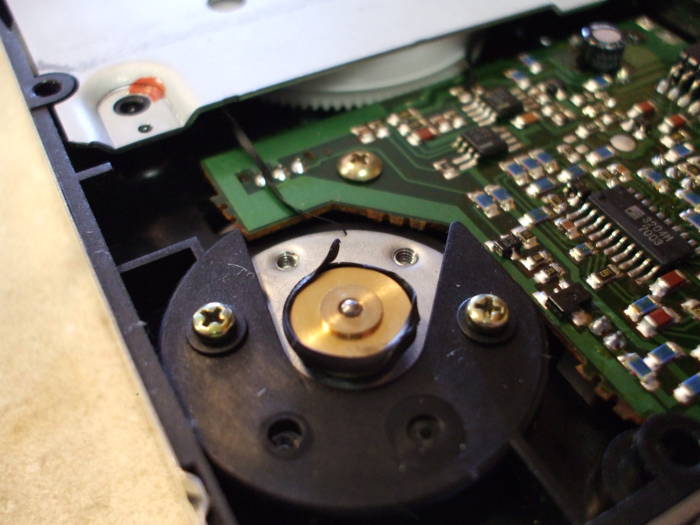
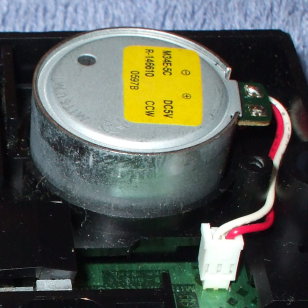
Mitsumi drives have a potentiometer on the drive motor to adjust the speed. "They are notorious for needing to be set to the exactly correct speed", my correspondent told me. You adjust the drive speed by inserting a slotted micro-screwdriver into the potentiometer hole on the top of the drive motor. There is a small black circular "window" as he called it, visible in the picture at right. He said that there should be two arrows marked + and - indicating which directions to turn the control to increase and decrease speed.
He suggested making tiny adjustments in either direction, searching for a setting that works. That's right, there seems to be no standard, it's just trial and error.
Another problem is caused by the spring on the read head losing tension. Worn media gets rippled, and the head needs to maintain enough pressure to follow the media (or deform the rippled media) but not so much pressure that it scrapes the media and further damages it or slows its rotational speed.
The spring tension can be adjusted, again by trial and error, by removing the head spring and giving it a slight twist. Wind it tighter by only a small fraction of a small turn using needle nosed pliers.
If it still isn't working, you can experiment with the index pin. The index pin is used to indicate rotational alignment, thereby specifying the position of the initial blocks on the disk. "If you look straight into the opening of the drive, where you insert media, you'll see the drive spindle. On the spindle, there is a tiny hex nut that you can loosen to adjust the spindle index position. Adjustments should be made in 5-degree increments. The hex hut had very shallow threads, so be careful not to lose it. All you need do is loosen it about 1/4 to 1/3 turn and then you'll be able to adjust the drive spindle."
The head position can also be adjusted, using the tension spring screw on the back of the head. "The tolerance on this is very specific."
The Lunar Orbiter Image Recovery Project has recovered over 2,000 images from 1,500 analog data tapes, containing the first high-resolution photographs taken from behind the lunar horizon and the first photograph of an Earthrise over the lunar horizon.
Five Lunar Orbiters took pictures from about 50 kilometers above the lunar surface onto 70 mm film. The film was then developed and scanned on board, and beamed back to Earth and recorded onto analog tape.
A group learned that former NASA employee had both the tapes and the Ampex FR-900 tape drives that could read them. They rebuilt the drives, demodulated and digitized the data, and reassembled the Earthrise image. That brought NASA funding to finish processing the entire collection.
In 1985 Andy Warhol produced some art experiments on an Amiga 1000 computer.
By April 2014 a group in Carnegie Mellon University's computer club recovered 18 of these images. They used magnetic imaging tools to copy data from the disks, and then had to write code to convert the images from the Amiga data format.
Ham radio, construction and repair, propagation, frequencies