How to Program Cisco and 3Com Ethernet Switches
Ethernet Switch Programming
Configuring a Cisco Catalyst 2900/3500/3550 XL switch
Cisco Catalystpassword reset
If the switch does not ask you about continuing with the initial configuration dialog, you must reset it to factory defaults. If the enable password is not set you can do the following. If an unknown enable password is set, then you will need to reset the password.
switch> enable

switch#erase startup-config
Verify that it worked:
switch#show startup-config

%% Non-volatile configuration memory is not present
Then power cycle the switch.
If you cannot get into enable mode without a password, see the section explaining how to break in on the console and reset the password.
To enter a new configuration:
-
Enter Y at the first prompt:
Continue with configuration dialog? [yes/no]: y -
Enter the switch IP address:
Enter IP address: XXX.XXX.XXX.XXX -
Enter the subnet mask:
Enter IP netmask: XXX.XXX.XXX.XXX -
Press <enter> to enter a default gateway:
Would you like to enter a default gateway address? [yes]: -
Enter the IP address of the default gateway:
IP address of the default gateway: XXX.XXX.XXX.XXX -
Enter the fully-qualified hostname for the switch:
Enter a host name: [Switch] switchname.example.com -
Enter the enable secret password:
Enter enable secret: your password here -
Press enter if you want a Telnet password:
Would you like to configure a Telnet password? [yes]: -
Enter the Telnet password:
Enter Telnet secret: your password here -
Enter
nounless you really want to enable this as a cluster command switch:
Would you like to enable as a cluster command switch? yes/no]:no -
It will show the initial configuration.
Type
yesif you got it all right, ornoto re-do it. - Now you need to fix the default SNMP settings, plus possibly more. Start by pressing enter to get a prompt.
-
Get into enable mode:
switch>enable -
Get into configuration mode:
switch#configure terminal
Note that you only need to typeconf t, or you can typeconfand press<tab>and then typetand press<tab>to get the IOS to auto-complete. -
If you want to support SNMP read-only access,
set a password which is not the well-known
default:
switch(c)#snmp-server community new-snmp-password RO -
Definitely disable the well-known default SNMP
passwords (community strings):
switch(c)#no snmp-server community private RW
switch(c)#no snmp-server community public RO -
You probably want to turn off Cisco Discovery Protocol:
switch(c)#no cdp run -
When you are done making configuration changes,
exit the configuration:
switch(c)#end
00:03:18: %SYS-5-CONFIG_I: Configured from console by console -
Verify that the configuration looks right:
switch#show running-config -
If all looks good, save the configuration:
switch#copy running-config startup-config
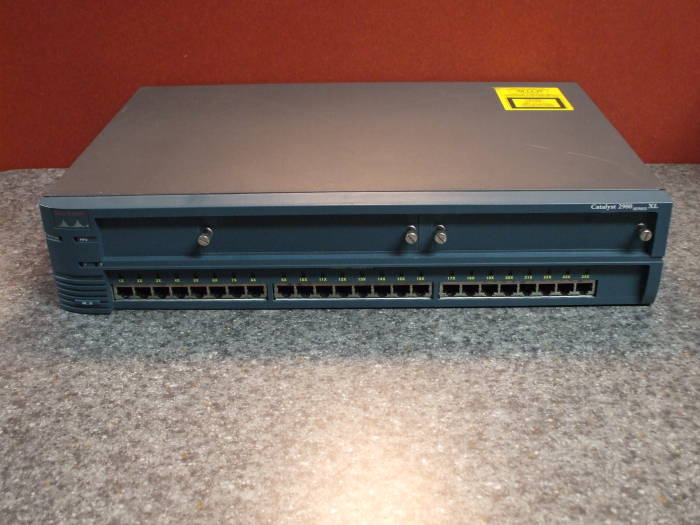
Cisco Catalyst 2924 XL Ethernet switch.
To erase an existing configuration
Get into enable mode and erase the startup configuration:
switch>enable
switch#erase startup-config
Verify that it worked:
switch#show startup-config
%% Non-volatile configuration memory is not present
Configuring a 3Com Superstack II 3000 switch
If you cannot get in with the below password, see the password recovery procedure below.
To enter a new configuration:
- Hit enter twice to get startup screen
-
Login:
Username:security
Password:security -
Select
SWITCH MANAGEMENTto do initial management:-
Hit space bar to select a Management Level
of
Unit -
Tab to
SETUPand hit enter -
At the
sysNamefield, type in the fully-qualified host name — likeswitchname.example.com -
Select
OKand hit enter -
If a TX module is installed:
-
Hit space bar to select
Port -
Type the module number at the
Port IDprompt -
Tab to
SETUPand hit enter - Set Speed/Duplex Mode to 100Mbps Full Duplex
-
Select
OKand hit enter
-
Hit space bar to select
-
Tab to
Canceland hit enter
-
Hit space bar to select a Management Level
of
-
Select
USER ACCESS LEVELSto configure the password and SNMP:-
Select
LOCAL SECURITY -
Using the space bar, Disable everything except
the
Securitycolumn andMonitor Community SNMPsettings. The result should look like this:Monitor Secure Manager Specialist Security Monitor Console port disabled disabled disabled disabled enabled Remote Telnet disabled disabled disabled disabled enabled Community-SNMP enabled disabled disabled disabled enabled - Select OK, hit enter
-
Select
EDIT USER -
Type the old password:
security -
Type the new password at both
New PasswordandConfirm Password -
Type the community string at
Community String -
Select
OKand hit enter -
Select
MAIN MENU
-
Select
-
Select
MANAGEMENT SETUPto configure the IP networking-
Enter the IP address at
Device IP Address -
Enter the subnet mask at
Device SubNet Mask -
Enter the default router's IP address at
Default Router -
Disable BOOTP by using the space bar as
needed at
BOOTP Select -
Disable SLIP by
setting
SLIP AddressandSLIP SubNet Maskto 0.0.0.0 -
Disable all IPX parameters by changing the
IPX
Statuscolumn to allDisabled -
Return to the main menu by selecting
OK.
-
Enter the IP address at
-
Select
LOGOFF - Label the device with name and IP address
To erase an existing configuration
-
Login using
securityand the current password -
Select
INITIALIZE. This will reset the switch to factory settings and reboot the switch. Wait until the switch completely reboots before unplugging it.
Switch configuration troubleshooting
-
If you cannot contact the switch with
ping, try topingfrom a host on the same subnet:-
If
pingfails from the same subnet:
verify IP address and netmask settings on the switch. -
If
pingsucceeds from the same subnet but fails from other subnets:
verify IP address, netmask, and default router settings on the switch.
-
If
-
If you have changed the IP settings but still
cannot contact the switch with
ping, and it is a 3Com, try power-cycling the switch. -
If you can contact the switch with
ping, but you cannot contact it with SNMP:
snmpget -v1 -c communitystring switch sysDescr.0
verify the SNMP community string on the switch. -
If you can contact the switch with SNMP only in
certain ways, then maybe it is a 3com Superstack II
or otherwise capable only of SNMPv1.
In that case this would fail:
snmpwalk -v2c -c communitystring switch
but this would succeed:
snmpwalk -v1 -c communitystring switch
You must use SNMPv1 with this device. This is unfortunate, as you cannot usesnmpbulkwalkorsnmpbulkget, which are much more efficient.
Breaking in on the console (if needed)
Cisco Catalyst 2900/3500/3550 XL
- Unplug the switch.
- Press the Mode button (left side of front panel) and keep it depressed.
- Reconnect power.
- When the LED above Port 1x goes out, release the Mode button.
-
Issue the flash_init command:
switch: flash_init
Initializing flash...
(output deleted...) -
Issue the load_helper command:
switch: load_helper -
Issue the dir flash: command (don't omit the colon):
switch: dir flash: -
You should see the configuration file listed
as
config.text.Rename it:
switch: rename flash:config.text flash:config.old -
Boot the switch with an empty configuration (that is, no
config.text):
switch: boot
Loading "flash:c2900xl-c3h2s-mz.120-5.WC7.bin"...########
(output deleted...) - The switch should now present you with the initial configuration dialog. You are ready to configure the switch.
3Com SuperStack II 3000
Enter recover as login name and password.
Then perform a "hard reset" by power cycling it
within 30 seconds.
It will reboot into password recovery mode and you can
enter a new administrative password.
Some backdoors may exist, depending on firmware level.
Try a login of 3comcso
and one of these passwords:
-
RIP000 -
RIP 000 -
RIP0000 -
RIP 0000
Or, you could try re-flashing the firmware:
- Put the firmware on a TFTP server.
- Press the switch reset button for 2 seconds, wait until the Management link light flashes three times, then press reset again for 1 second. You should see a prompt. (If this doesn't work, try waiting three seconds instead of waiting for three flashes)
-
Issue these commands, changing the firmware file name
as needed and supplying the IP address of the TFTP
server:
F ls3k3_23.six
B TFTP-IP-Address
(If this doesn't work, you may need to specify the factory-default password "RIP 000" between theFandBcommands) -
If successful, a login of
adminwith an empty password should work. But if unsuccessful, you may render the switch unusable...
An alternative is to plug the switch into a managed stack and then reset the passwords for the entire stack.
Hardware setup
Connect to the console port
If you have a serial port, connect that to the switch. If you only have USB ports, use a USB-to-serial adaptor. Device names will be:
| Serial | Mac | serial0 |
| Linux | /dev/ttyS0 |
|
| BSD | /dev/ttyC0 |
|
| USB-to-Serial | Mac | usbserial0 |
| Linux | /dev/usb/ttyUSB0 |
|
| BSD | /dev/ttyU0 |
Install a terminal emulator (if needed)
| Mac | ZTerm |
| Linux, BSD | minicom |
Set the serial port:
9600 baud, 8 bits of data, no parity, 1 stop bit ("8-N-1"), hardware flow control.
Hardware debugging (if needed)
Expect to see some recognition of the USB-to-serial device.
The dmesg command should show something like this:
uplcom0 at uhub0 port 2
uplcom0: Prolific Technology Inc. USB-Serial Controller, rev 1.10/3.00, addr 2
ucom0 at uplcom0
You may need to configure the serial port to keep the
switch happy.
If the USB port puts the serial port into an odd state,
the Cisco switch will not complete booting with a
faulted console port.
With minicom run minicom -s,
set up the serial port, and tell minicom to
initialize the port.