
How to Install CyanogenMod on the Samsung Galaxy S2
Installing CyanogenMod
CyanogenMod is an open-source replacement operating system based on the Android mobile OS. It provides features and performance improvements not found in the official OS distributed by the vendors. Plus, you can get away from the dreadful Kies software that Samsung otherwise forces you to use to keep your phone updated.
One problem is that Kies only runs on Windows. That's an odd design choice for supporting a device running a completely different operating system. Another problem is that you eventually get to the point where Kies insists that it must update itself before continuing, except it must remove the old version before updating, except it must update itself before removing anything, and so on forever. The Kies uninstaller does not completely remove Kies, leaving you with a Windows system contaminated by a partial Kies installation that can't be updated or completely removed.
So, let's replace the operating system on our smart phone!
It's actually quite easy to replace the operating system on an Android smart phone, but only if you have the needed information about the software tools you should use and the modules you need to install.
If you are completely new to this, you need to learn a few terms and concepts.
I have built a lot of Linux kernels on i386, IA64, and Alpha hardware, but I found this rather confusing due to the lack of details.
This page is based on my notes, I hope that you find it useful.
Operating Systems are Hardware-Specific!
This is made more complicated and a little confusing because some smart phone model names really refer to multiple varying designs built for different carriers. The kernel for one is, of course, entirely inappropriate for a different design that happens to have the same basic name.
The Samsung Galaxy S II is a striking example of a collection of very different designs that would appear to be identical.
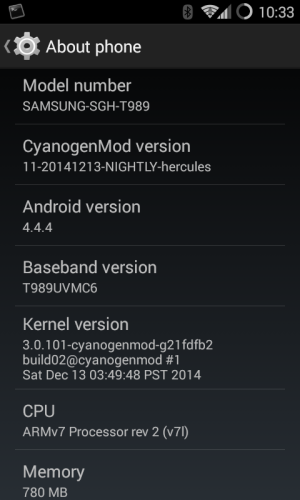
Check to see how your phone identifies itself:
Home screen —>
Menu button —>
About Phone.
The Model number appears toward the bottom of that screen.
This screenshot shows my phone identifying itself as a SGH-T989. That is the Galaxy S II specific to T-Mobile. If you have any other specific phone model, the directions on this page not only won't work, but they very likely would render your phone useless and unrepairable. Do not proceed unless you are quite certain that this page is applicable, and even if you do have this very phone model I cannot guarantee that you will not ruin your phone.
The T-Mobile variant of the Galaxy S II has a 1.5 GHz dual-core Qualcomm APQ8060 (S3) Scorpion processor. while most of the other variants use a 1.2 GHz dual-core ARM Cortex-A9 processor in a Exynos 4210 System-on-Chip. The T-Mobile cellular radio section operates on UMTS bands I (2100 MHz), II (1900 MHz), IV (1700 MHz) and V (850 MHz). It has four touch-capacitive buttons, instead of a three-button hardware/capacitive combination.
According to RgbenchMM, my phone does 475 Mflops for a single-threaded process, 1178 Mflops for a 2-thread process, and 1097 Mflops for a 4-thread process. It has 1 GB of RAM, plus 16 GB of flash memory functioning as a fixed disk plus up to 128 GB of storage on an added card.
| Platform | Mflops (peak) |
RAM | Release | World's Fastest |
| Cray-1 | 136 | 64 MB | 1976 | 1976–1982 |
| Cray X-MP | 713 | 64 MB | 1982 | 1983–1985 |
| Cray Y-MP | 2144 | 512 MB | 1988 | 1988–1989 |
| Samsung Galaxy S II | 1178 | 1024 MB | 2011 | — |
RgbenchMM runs directly on the device rather than on the Java Virtual Machine. Discussion here says that the Linpack for Android app grossly under-reports the phone's performance. Its authors say "This test is more a reflection of the state of the Android Dalvik Virtual Machine than of the floating point performance of the underlying processor." Others have reported that with Linpack it's measured at 93.4 MFLOPS in single-threaded processes and 53.87 MFLOPS in multithreaded.
You Have Three Boot Choices on a Samsung Android
If you simply turn on the phone by pressing the power button, the Android operating system boots. There are, however, two other ways to start the phone.
Download or Odin mode runs a program named Odin on the phone. It allows you to download a single file known as a recovery image.
Recovery mode boots that recovery image. The stock recovery image from Samsung has a few capabilities. The recovery images from the CyanogenMod community have many more, including the ability to wipe the existing installed operating system and to install a new one from a zip file.
Getting the Correct Collection of Installation Files
You need both a recovery image file and a system zip file. The system zip file is often referred to as "a ROM". The recovery image file is about 6-12 MB in size, while the system zip file is more like 150 to 220 MB. Get a recent or current system zip file, and a recovery image that goes with it. Older recovery images cannot install recent system zip files, they will fail without clearly explaining exactly why.
I used the stable system zip files from the cyanogenmod.org site, but I was not able to get them correctly installed with the ClockworkMod Recovery (CWR) recovery image they recommend and link from their how-to page. I don't know if this was because the image was not really suitable, or if it was because their instructions were incomplete or faulty.
While you're at it, get the latest Google Apps zip file. Android is open-source, the Google Apps are not, so you need to add these. I got a current version at rootzwiki.com, which links to the same downloads as Android Jinn. Again, be very careful to get the correct version for your phone. Also, if you are upgrading to a newer version of CyanogenMod, then make sure to check and see if a newer Gapps zip file is available.
Finally, if you are upgrading a Samsung Galaxy S2 to
CyanogenMod 10.1 or later also get the zip file to
update the radio drivers
or else you phone will not be able to communicate with
the networks!
You could ask Google to find discussion of the radio
driver updates with this query:
samsung hercules cyanogenmod xda radio
If you know what's going on and what to ask for,
ask Google something like this:
sgh-t989 radio.zip
I installed the far superior recovery image from TWRP, TeamWin Recovery Project. Be aware that the recovery image is specific to the hardware. If you do not have precisely the correct version, you will "brick" your phone. That is, you will turn it into an expensive but inert object.
I then used TWRP to install the latest CyanogenMod image on my phone.
At one point I was upgrading from CyanogenMod 10.0 (really 10.1-20130411-EXPERIMENTAL-hercules-M3) to 10.1.0. I used the following three files for the operating system, the radio drivers, and the Google apps or Gapps.
| File | SHA-1 hash | bytes |
cm-10.1.0-hercules.zip |
7e9d8ea783cb8ec9940ab4ec10859ff6d463746f |
163,794,208 |
SGH-T989_UVMC6_radio.zip |
45c50f94967b278065cba3e762d41264f5078e2a |
20,825,701 |
gapps-jb-20130301-signed.zip |
e3e730f14ab1cc38817938bf3679a8c69ff03917 |
95,417,279 |
More recently I upgraded to CyanogenMod 11 with an accompanying upgrade to the Google Apps package.
| File | SHA-1 hash | bytes |
cm-11-20141205-NIGHTLY-hercules.zip |
7e71ad1a3244952876e69f6f825af586a8bdd87a |
219,784,503 |
gapps-kk-20140606-signed.zip |
8fbba5024b9d811998b47a38003665c0e8424b1c |
157,694,716 |
Preparing the Installation
Don't even start until you have your phone fully charged. You would not want to lose power in the middle of this!
Verify one last time that you are collecting images for the correct hardware.
Put the recovery image file on your Linux (or OS X, or even Windows) machine.
Install the system image zip files and the Google Apps zip file on your phone. It's your choice, put them in the root of either the phone itself or the SD card.
Get the current version of the
Heimdall program
from Github.
Click on the ZIP button on that page to download
Heimdall-master.zip.
Finally, back up your data.
Install the Recovery Image with Download or Odin Mode
First, press and hold the Volume Up and Volume Down buttons, and within a few seconds connect the USB cable to a computer.
Keep the two volume buttons depressed until you see the warning screen in the first picture below
"Warning!! A custom OS can cause critical problems in phone and installed applications", they say. Yes, that's quite true.
Wow, that screen protector film sure makes my display look grungy! It protects the glass but it saves all your fingerprints...
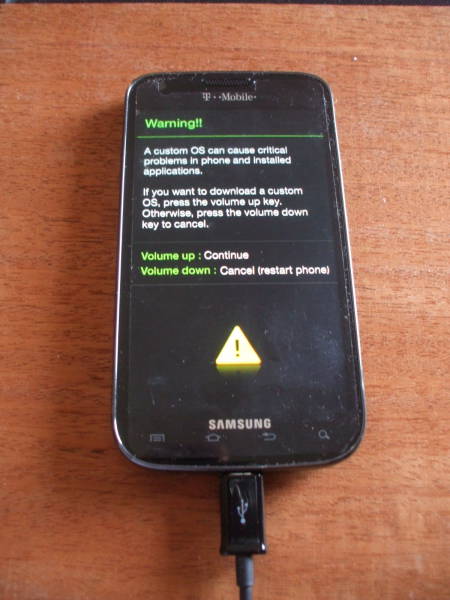
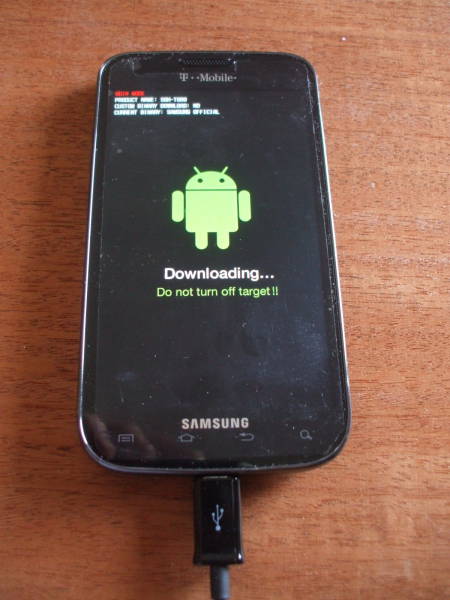
This is your last chance to make absolutely certain that you have precisely what you need and you know what you are doing. If so, press the Volume Up key to enter download mode. This will take you to the second screen you see above.
The idea is that you would now download an image, a bootable piece of firmware, into a specific location on the phone. That image would overwrite the recovery image, with the intent of using it in a following step to install a new system image.
The tool to use is Heimdall. You will need to build Heimdall on your own. Some web pages provide you with links where you can download a prebuilt binary, and the Mageia distribution even has a Heimdall in its RPM repository.
However, when you use these prebuilt versions, you may get
some rather mysterious failures.
If you run Heimdall in the default way, you don't see any
error messages.
But, nothing really happens.
The phone screen continues to show the "Do not turn off"
warning, and you will have to forcibly shut it off.
This is OK, as it hasn't even started downloading a new
recovery image.
When you run the faulty version of Heimdall with the
-verbose flag, you see several lines like this:
ERROR: libusb error -7 whilst receiving packet. Retrying...
Build Heimdall from the zip archive of source code.
You also need the libusb and libusb-devel
packages.
On
Mageia
these were named
libusb1.0_0
and
libusb1.0-devel.
Install them with the appropriate
package management tool.
Then:
- Extract the zip archive.
- Configure, build, and install libpit.
- Configure, build, and install heimdall.
$ cd /tmp
$ unzip ~/Heimdall-master.zip
$ cd Heimdall-master
$ cd libpit
$ ./configure
$ make
$ su root -c 'make install'
$ cd ../heimdall
$ ./configure
$ make
$ su root -c 'make install'
Your newly installed heimdall program should work.
The correct output looks something like this:
# /usr/local/bin/heimdall flash --recovery openrecovery-twrp-2.3.3.0-hercules.img
Heimdall v1.3.1, Copyright (c) 2010-2011, Benjamin Dobell, Glass Echidna
http://www.glassechidna.com.au

This software is provided free of charge. Copying and redistribution is
encouraged.

If you appreciate this software and you would like to support future
development please consider donating:
http://www.glassechidna.com.au/donate/

Initialising libusb...
Detecting device . . . OK
Opening device . . . OK
Resetting device . . . OK
Requesting device description . . . OK
Requesting device config . . . OK
Examining device interfaces.

Done examining device interfaces.
Claiming interface index 0 . . . OK
Claiming interface index 1 . . . OK
ERROR: Checking protocol...
Checking if protocol is initialised...
... no not really.
ERROR: ... protocol not already initialized.
Initialising protocol.
Clearing halts.
Clearing halt from endpoint address 82 . . . OK (0 bytes transferred)
Clearing halt from endpoint address 81 . . . OK (0 bytes transferred)
Clearing halt from endpoint address 01 . . . OK (0 bytes transferred)
Done clearing halts.
CLEAR_COMM_FEATURE 1 . . . EPIPE
GET_COMM_FEATURE . . . EPIPE
SET_COMM_FEATURE . . .EPIPE
SET_CONTROL_LINE_STATE . . .OK (0 bytes transferred)
GET_LINE_CODING . . .EPIPE
GET_LINE_CODING . . . EPIPE
INTERRUPT . . . sync control request 32 . . . OK (7 bytes transferred)
sync control request 34 0x0003 . . . OK (0 bytes transferred)
sync control request 34 0x0002 . . . OK (0 bytes transferred)
sync control request 32 . . . OK (7 bytes transferred)
Handshaking with Loke...

Beginning session...
Session begun with device of type: 0

Downloading device's PIT file...
PIT file download sucessful

Uploading RECOVERY
100%
RECOVERY upload successful
Ending session...
Rebooting device...
Use Recovery Mode to Back Up Your Original Android Operating System
Don't be like me, back up your original so you could go back to that if you wanted to!
The pages I found for guidance made no mention of this.
Given the way that I use Linux, building custom kernels and building and adding all sorts of software, I'm OK with staying in the CyanogenMod world. But many people will want a way to get back to the original factory version.
Use Recovery Mode to Install the System Image
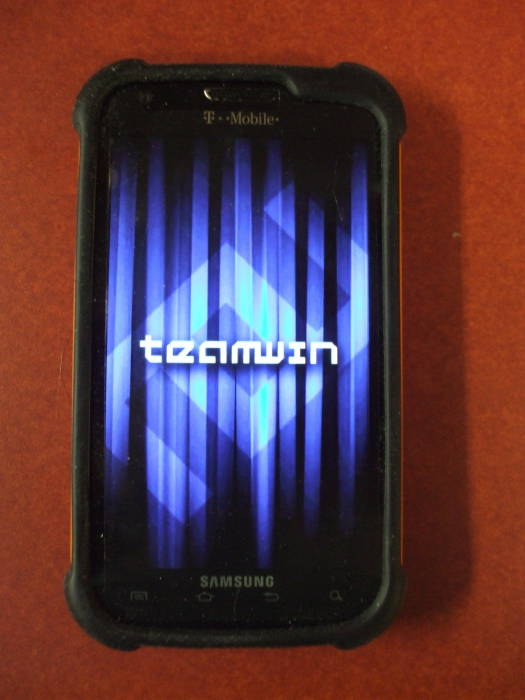
Get into Recovery mode by first pressing and holding down the Volume Up and Volume Down buttons simultaneously. Keeping them held down, press and hold the Power button until you feel the phone vibrate. You can release the power button, but keep the two volume buttons depressed until you see the TWRP splash screen as shown in the first picture below.
It will soon change to the main menu as seen in the second picture. TWRP supports the touch screen, poke the Wipe menu to get started.
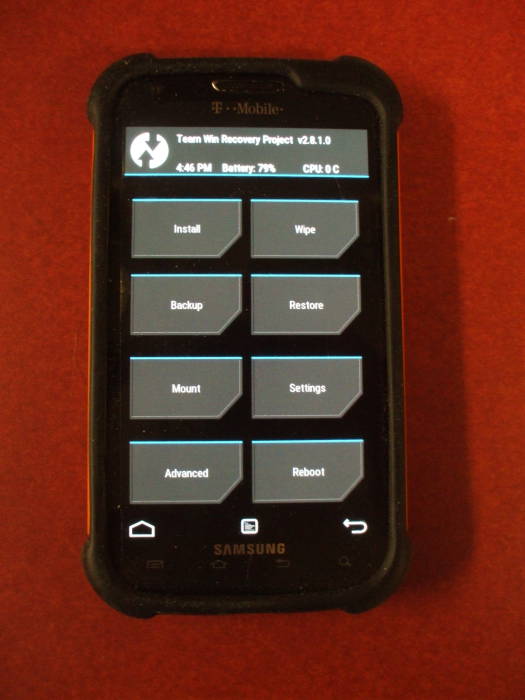
Here we go.
If you are transitioning from stock Android to CyanogenMod, or if you are making a major CyanogenMod update (for example, 10.x to 11.x), then start with a factory reset. Doing that on recent TWRP also wipes the system data, the cache, and the Dalvik cache, which you would want to do anyway.
Do you need to do a factory reset and wipe the system data? It depends — for upgrades like CyanogenMod 10.0 to 10.1, not necessarily. But why not?
Go back to the top level menu of TWRP and select Install.
I put the system image zip files on the SD card, so I could browse to their location and select them. If I had instead put the zip files on the phone itself, just click Use internal storage here. Pick the one you want and you will be taken to a verification screen.
Make sure that you also install the corresponding
Google Apps bundle gapps
when you upgrade to a newer version of CyanogenMod!
Just include it as another zip file to install at the
same time.
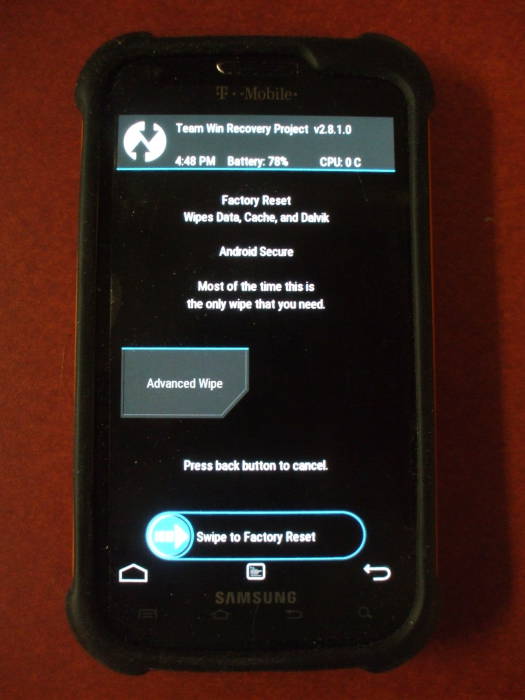
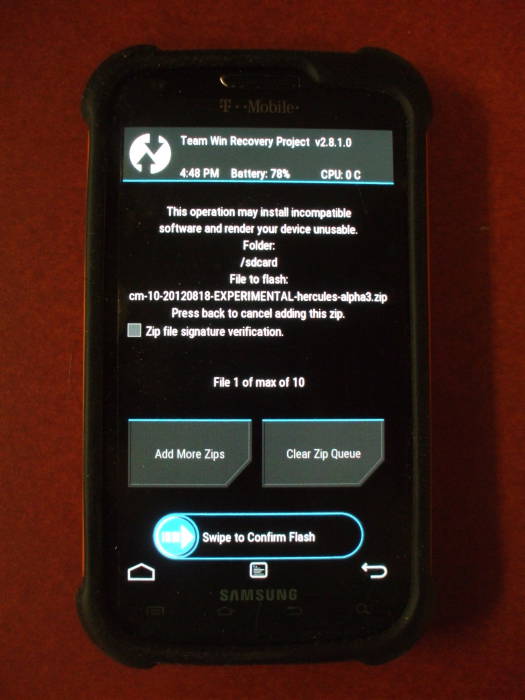
Verify that you're installing what you want and tell it to go ahead. The installation process will take maybe 20-30 seconds.
When it's done, select Reboot System.
It worked!
Finally!
I had gotten stuck in an endless boot animation loop when I first tried this, before I learned about the newer and more capable TWRP and before I learned about the importance of wiping the existing system before installing the new one.
It took me a little over a day to get CyanogenMod successfully booting on my phone, as I slowly figured out the contradictory suggestions in various on-line forums. Hopefully this page will help you to finish the project much faster!
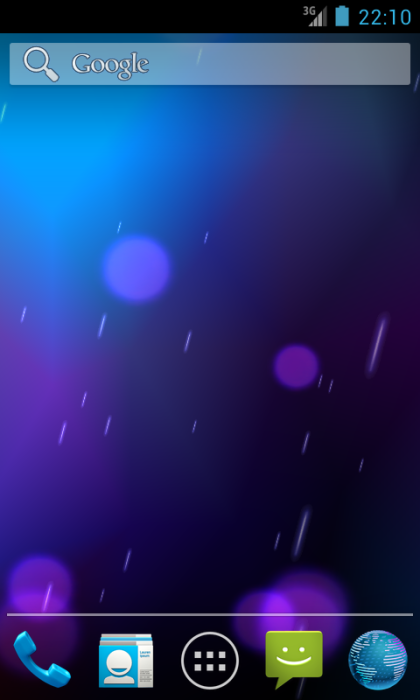
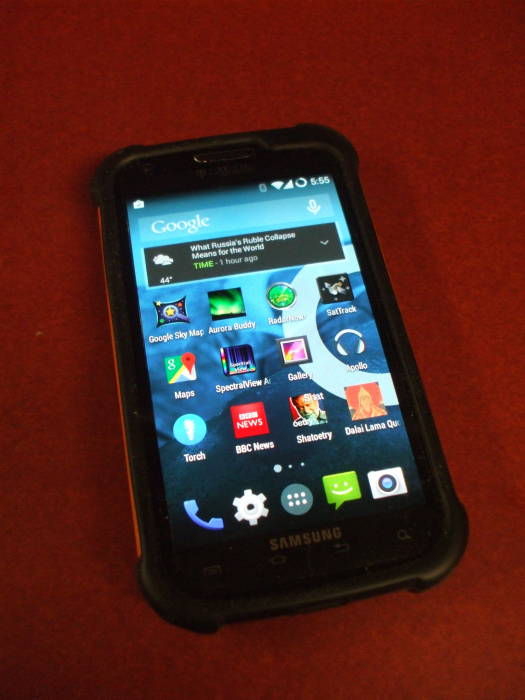
Now my phone is running a version of Android several versions beyond what is available from T-Mobile or Samsung. It's based on a later Linux kernel version than the official Android release.
CyanogenMod shows us more details of the hardware. Here we see its version and its build number plus some details on the CPU and memory.
I initially ended up rolling back to Android version 4.1.1 based on Linux kernel 3.0.40 because USB mass storage did not (yet) work under Android 4.1.2 on the SGH-T989. I later found that USB mass storage on the SGH-T989 appeared and disappeared from one version to the next.
A few months later I upgraded to CyanogenMod 10.1-20130411-EXPERIMENTAL-hercules-M3, a monthly snapshot based on Android version 4.2.2 and kernel 3.0.66.
A few months after that I upgraded to CyanogenMod 10.1.0 based on Android 4.2.2 and kernel 3.0.72. And just a few weeks later, I jumped 10.1.1 to 10.1.2.
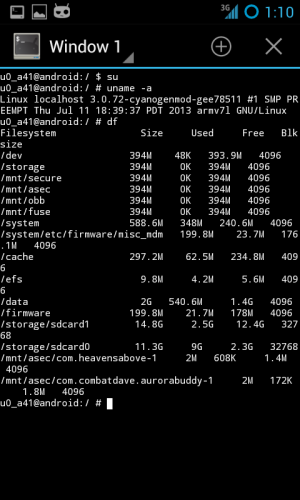
The CyanogenMod developers changed their model and stopped tagging versions as stable. For the Hercules / SGH-T989, there weren't even those labeled as "M" or Milestone. So I have gone to the nightly builds.
Make sure that you also install the corresponding
Google Apps gapps bundle
when you upgrade to a newer version of CyanogenMod!
Since I have those zip files stored on the SD card, I can change between the CyanogenMod versions.
I don't see this as a boot loader. On Linux you can have a bunch of kernels and choose from them at boot time with the GRUB boot loader. With Android and CyanogenMod you can change from one OS version to another, but it requires a wipe and reinstall.
Be Careful!
While I hope that you find this page helpful, there is no guarantee that you will not destroy your smart phone by using any of these suggestions.