Installing FreeBSD on a Raspberry Pi
FreeBSD on the Raspberry Pi
We're building an Active Directory server from Samba running on FreeBSD, free server software on a free operating system. We have set up the needed DNS infrastructure on an existing BIND master (or primary) DNS server. Our next step is to put together a system that we will make a slave (or secondary) DNS server, an initial step in building a Samba-based Active Directory server. We will do this with FreeBSD running on a Raspberry Pi. We must take a few extra steps in this stage because of Samba's requirements for file system security. That requirement for POSIX Access Control Lists along with this admittedly uncommon combination of operating system and hardware means that I will have to modify a file system. Jump back to the start for an overview of the project.
How to install FreeBSD on a Raspberry Pi
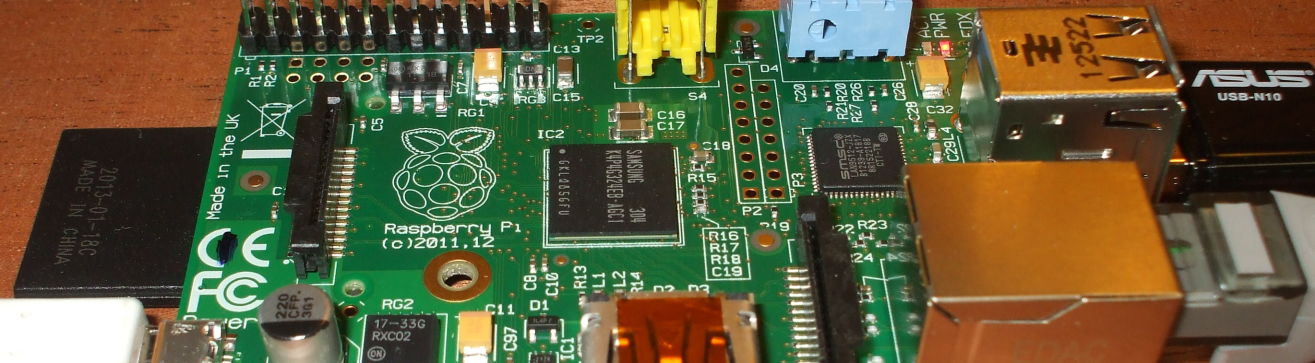
Jump to the next step if you aren't using FreeBSDI initially used a Raspberry Pi 1 Model B+ for this project. It has a Broadcom BCM2835 SoC or System on Chip, which includes a 700 MHz ARM1176JZF-S processor, 512 MB of RAM, and a VideoCore IV GPU. The CPU performance is about like a 300 MHz Pentium II of 1997-1999, so bear in mind that this is just for initial testing and experimentation. Do not try to run your enterprise on a Raspberry Pi Model B+.
A Raspberry Pi 3, by comparison, has a 4-core CPU with a
faster clock, for about 10 times the CPU performance.
It would get the Samba suite of services running faster.
We will see in a later step that there are something like
13 samba processes,
3 smbd processes, and
2 winbind processes
running simultaneously.
More cores would definitely help.
Still, don't run the entire enterprise on one Raspberry Pi.
They only cost US$ 30-35.
At least get several and set up replication,
load balancing, and failover.
(But seriously, you probably don't want to deploy this.)
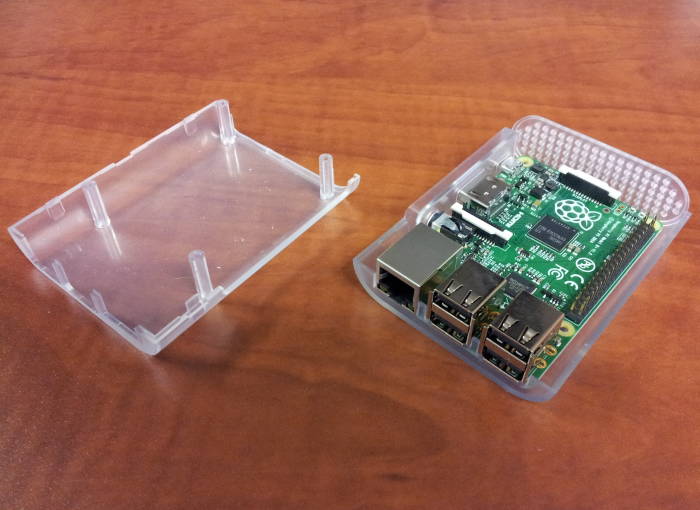
Both the Raspberry Pi 1 B+ and the model 3 have 4 USB 2.0 ports, a 100 Mbps Ethernet port, and HDMI video and audio output. You power it from something like a smart phone charger, ideally one that provides more current than the usual 1000 mA.
I later moved the project to a 4-core Raspberry Pi 3. That provides more CPU cores for all the server processes.

A single-core Raspberry Pi Model B+.
You can download FreeBSD images from raspbsd.org or from freebsd.org.
There is also a page about FreeBSD on the Raspberry Pi at FreeBSD.org, although that page seems to be updated much less frequently.
I'm doing this on Linux.
If you're writing the image on a BSD system with one disk
/dev/sd0*,
the microSD card will appear as something like
/dev/sd1i
and the device inventory will not change.
On either Linux or BSD,
look at the kernel ring buffer with:
dmesg | tail
and see what just appeared after you plug in
the microSD card.
I downloaded the image, uncompressed it, and wrote it
onto a memory card with dd.
Be very careful to select the correct device!
I ran df first, and if I were using LVM I
would have run pvscan,
all of that to inventory all the disks holding my data.
Then get a listing of all device files /dev/sd*.
Now plug in the USB device with the SD memory card and
see what was added.
As I have several disks in my system, /dev/sda
through sdf, I saw that the two new devices
were sdg and sdg1.
This is because the card has an IBM MBR partition table
defining one partition spanning the device, and a VFAT
file system in that partition.
Write the image onto the entire device,
being careful to choose the correct target location.
Change "sdX" as appropriate in the following.
I used sdg but don't destroy your data
by overwriting the wrong device.
# dd if=FreeBSD-*-RPI-*.img of=/dev/sdX bs=10M
I connected an Ethernet cable and the power supply,
and waited for it to boot up.
I saw it get an IP address from my DHCP server.
I connected in over SSH as user raspberry
with password raspberry
for the image from
raspbsd.org.
From there I could run su to become
root without a password.
Here's the resulting file system.
It resizes the root partition to fill the device at
first boot.
My "disk" is a 32 GB microSD card.
$ df -hT
Filesystem      Type       Size    Used   Avail Capacity  Mounted on
/dev/mmcsd0s2a  ufs         29G    1.8G     25G     7%    /
devfs           devfs      1.0K    1.0K      0B   100%    /dev
/dev/mmcsd0s1   msdosfs     17M    4.1M     13M    24%    /boot/msdos
/dev/md0        ufs         29M     24K     26M     0%    /tmp
/dev/md1        ufs         14M     56K     13M     0%    /var/log
/dev/md2        ufs        4.4M    8.0K    4.0M     0%    /var/tmp
Setting up my user account
I created a user account for myself with the same UID/GID
as on my other systems, and copied .vimrc,
.cshrc, and .ssh/ into place.
I also added myself to the wheel group.
Modifying /etc/rc.conf
My main Linux system has one interface on the interior
network, with hostname router resolving
to both IPv4 and IPv6 addresses.
It runs the
RADVD
IPv6 Router Advertisement Daemon,
and forwards both IPv4 and IPv6 to and from the Internet
on another interface connected to a cable modem.
It advertises a fc00::/7 prefix internally as per
RFC 4193.
The FreeBSD /etc/rc.conf file originally
contained these lines (along with several others):
hostname="raspberry-pi"
ifconfig_ue0="DHCP"
#ntpd_enable="YES"
syslogd_enable="NO"
I replaced those lines with the following to customize the hostname and networking.
##ORIGINAL hostname="raspberry-pi"
hostname="freebsd"
##ORIGINAL ifconfig_ue0="DHCP"
ifconfig_ue0="inet 10.1.1.235/24"
defaultrouter="router.example.com"
ipv6_prefix_ue0="fc00:0:0:0"
ipv6_defaultrouter="router.example.com"
##ORIGINAL #ntpd_enable="YES"
ntpd_enable="YES"
##ORIGINAL syslogd_enable="NO"
syslogd_enable="yes"
I restarted networking with the /etc/netstart
script and found that things have worked:
$ ifconfig
lo0: flags=8049<UP,LOOPBACK,RUNNING,MULTICAST> metric 0 mtu 16384
	options=600003<RXCSUM,TXCSUM,RXCSUM_IPV6,TXCSUM_IPV6>
	inet6 ::1 prefixlen 128
	inet6 fe80::1%lo0 prefixlen 64 scopeid 0x1
	inet 127.0.0.1 netmask 0xff000000
	groups: lo
	nd6 options=21<PERFORMNUD,AUTO_LINKLOCAL>
ue0: flags=8843<UP,BROADCAST,RUNNING,SIMPLEX,MULTICAST> metric 0 mtu 1500
	options=80009<RXCSUM,VLAN_MTU,LINKSTATE>
	ether b8:27:eb:41:b9:ae
	inet 10.1.1.235 netmask 0xffffff00 broadcast 10.1.1.255
	inet6 fe80::ba27:ebff:fe41:b9ae%ue0 prefixlen 64 scopeid 0x2
	inet6 fc00::ba27:ebff:fe41:b9ae prefixlen 64
	media: Ethernet autoselect (100baseTX <full-duplex>)
	status: active
	nd6 options=21<PERFORMNUD,AUTO_LINKLOCAL>

$ netstat -r
Routing tables

Internet:
Destination          Gateway             Flags     Netif Expire
default              router.example.com  UGS         ue0
10.1.1.0/24          link#2              U           ue0
freebsd.example.com  link#2              UHS         lo0
localhost            link#1              UH          lo0

Internet6:
Destination          Gateway             Flags     Netif Expire
::/96                localhost           UGRS        lo0
default              router.example.com  UGS         ue0
localhost            link#1              UH          lo0
::ffff:0.0.0.0/96    localhost           UGRS        lo0
fc00::/64            link#2              U           ue0
fc00::ba27:ebff:fe   link#2              UHS         lo0
fe80::/10            localhost           UGRS        lo0
fe80::%lo0/64        link#1              U           lo0
fe80::1%lo0          link#1              UHS         lo0
fe80::%ue0/64        link#2              U           ue0
fe80::ba27:ebff:fe   link#2              UHS         lo0
ff02::/16            localhost           UGRS        lo0

$ traceroute www.google.com
 1  router.example.com (10.1.1.100)  1.703 ms  1.499 ms  1.422 ms
 2  96.120.112.89 (96.120.112.89)  17.280 ms  9.576 ms  10.053 ms
 3  68.85.180.213 (68.85.180.213)  9.543 ms  9.771 ms  9.768 ms
 4  68.86.184.189 (68.86.184.189)  10.917 ms  11.047 ms  11.122 ms
 5  68.86.197.49 (68.86.197.49)  22.263 ms  21.605 ms  21.943 ms
 6  be-33491-cr01.chicago.il.ibone.comcast.net (68.86.92.33)  23.310 ms  23.166 ms  22.689 ms
 7  be-10506-cr02.350ecermak.il.ibone.comcast.net (68.86.86.229)  25.958 ms  27.498 ms  27.028 ms
 [... several hops deleted ...]
15  209.85.250.237 (209.85.250.237)  46.348 ms  47.041 ms  46.873 ms
16  den03s09-in-f4.1e100.net (216.58.217.4)  46.300 ms  46.433 ms  46.700 ms

$ traceroute6 www.google.com
 1  router.example.com  2.055 ms  1.903 ms  1.797 ms
 2  2001:558:600d:16::1  10.707 ms  10.560 ms  11.185 ms
 3  2001:558:302:191::1  9.734 ms  10.111 ms  9.955 ms
 4  2001:558:320:9a::2  9.845 ms  9.364 ms  9.548 ms
 5  2001:558:300:15c::1  18.606 ms  17.251 ms  17.699 ms
 6  2001:558:300:2003::1  28.996 ms  29.607 ms  29.016 ms
 7  be-33491-cr02.350ecermak.il.ibone.comcast.net  30.339 ms  30.031 ms  31.602 ms
 [... several hops deleted ...]
15  2001:4860:0:1::121f  49.468 ms
    2001:4860::1:0:a619  56.989 ms
    2001:4860:0:1::121f  49.451 ms
16  den03s09-in-x04.1e100.net  49.241 ms  57.925 ms  58.238 ms
Configuring Syslog
I edited /etc/syslog and commented out
all the lines sending output to files.
Then I added one line to the end, sending all syslog output
to my log collector.
The result is:
# egrep -v '^#|^$' /etc/syslog.conf
include		/etc/syslog.d
include		/usr/local/etc/syslog.d
*.*		@10.1.1.100
The syslogd daemon on FreeBSD does not include its hostname
in the message.
Its message is simply the timestamp,
daemon[PID], and then the message.
Compare that to other syslog daemons that insert the
hostname after the timestamp.
If there is no hostname or IP address in the message,
the log collector will insert the IP address of the source.
If the log collector is using Rsyslog,
add a new file to get it to resolve that to a name.
It can be named anything as long as it ends
".conf".
# cat /etc/rsyslog.d/fqdn.conf
$PreserveFQDN on
# systemctl restart rsyslog
Configuring the time zone
Until you set the time zone with tzsetup,
times and dates will be reported in UTC as
no local time has been defined.
You have many choices, they are defined by the files
under /usr/share/zoneinfo.
Do something like this:
# tzsetup EST5EDT
Refer to the hierarchy of files, in the Yukon you could do something like this:
# tzsetup America/Yellowknife
Also recall that we configured the NTP daemon to run. Kerberos requires time synchronization.
Mounting the root file system with POSIX ACLs
Samba requires that the file system support
POSIX access-control lists.
I modified /etc/fstab,
additions are highlighted in yellow:
/dev/mmcsd0s1	/boot/msdos	msdosfs rw,noatime	0 0
/dev/mmcsd0s2a	/		ufs rw,noatime,acls		1 1
md		/tmp		mfs rw,noatime,-s30m,acls	0 0
md		/var/log	mfs rw,noatime,-s15m,acls	0 0
md		/var/tmp	mfs rw,noatime,-s5m,acls	0 0
However, the mount command after the next boot
showed that the root file system was mounted with
the incompatible nfsv4acls option.
The others all had the requested acls option.
The following line went to /var/log/messages
at each reboot:
freebsd kernel: WARNING: /: NFSv4 ACLs flag on fs conflicts with "acls" mount option; option ignored
This was mysterious, as kenv showed that the
kernel environment looked right:
# kenv
LINES="24"
autoboot_delay="10"
bootfile="kernel"
console="uboot"
currdev="disk0s2a:"
interpret="OK"
kernel="kernel"
kernelname="/boot/kernel/kernel"
loaddev="disk0s2a:"
loader_conf_files="/boot/loader.conf /boot/loader.conf.local"
module_path="/boot/kernel;/boot/kernel;/boot/modules;/boot/dtb"
prompt="loader>"
twiddle_divisor="1"
vfs.root.mountfrom="ufs:/dev/mmcsd0s2a"
vfs.root.mountfrom.options="rw,noatime,acls"
I tried creating a new file /boot/loader.conf.local
with these contents:
vfs.root.mountfrom.options="rw,nonfsv4acls,acls,noatime"
That added the nonfsv4acls option to the
kernel environment, but it did not have the desired effect.
Other file systems could be interactively modified:
# mount | grep /var/tmp
/dev/md2 on /var/tmp (ufs, local, noatime, soft-updates, acls)
# mount -u -o noatime,noacls,nfsv4acls /var/tmp
# mount | grep /var/tmp
/dev/md2 on /var/tmp (ufs, local, noatime, soft-updates, nfsv4acls)
# mount -u -o noatime,acls,nonfsv4acls /var/tmp
/dev/md2 on /var/tmp (ufs, local, noatime, soft-updates, acls)
But for the root file system, the mount command
to change the options ran with no error or warning message,
and exited with a status of 0.
However, the attributes did not change:
# mount | grep s2a
/dev/mmcsd0s2a on / (ufs, local, noatime, journaled soft-updates, nfsv4acls)
# mount -u -o noatime,acls,nonfsv4acls /
# echo $?
0
# mount | grep s2a
/dev/mmcsd0s2a on / (ufs, local, noatime, journaled soft-updates, nfsv4acls)
The problem is that the root file system in the Raspberry Pi
image is set to always use the nfsv4acls
option for NFSv4 ACLs.
If NFSv4 ACLs are in use, POSIX ACLs cannot be enabled.
As explained on the FreeBSD Access Control Lists, page, the mount-time flag can be set in a persistent manner by modifying a flag in the superblock, the file system header. If a flag is set there, it will be used. It cannot be modified without unmounting the file system, and you cannot unmount the root file system.
As that page explains, for security you want to mark the file system itself, precisely for the reason that I was unable to proceed — an intruder who gains root access cannot disable ACL protection. ACLs that are enforced within the superblock can prevent a user with otherwise unlimited power from modifying protected components of the file system.
I agree with the logic. This is analogous to the reason why in Linux you should not be able to disable the Security-Enhanced Linux protection while the kernel is running. You should be forced to reboot the system and disable it at boot time, requiring physical access to the console. Notice that Red Hat chooses to build their kernels to allow it to be changed during run time, decreasing security but making it easy to help their customers solve problems. The kernel build configuration variable is SECURITY_SELINUX_DISABLE, "y" means that it can be disabled while running. In the kernel build configuration interface: Security Options → NSA SELinux Support → NSA SELinux runtime disable.
BuildingLinux
kernels
Samba requires POSIX ACLs for part of its database,
maintained under /var/db/samba4.
It uses the ACLs for the part under
/var/db/samba4/sysvol.
There is no other persistent file system
(/var/log, /var/tmp,
and /tmp are
based on RAM, the md pseudodevice.
So, the root file system itself has to be modified,
and tunefs is
the tool for the job.
On typical server hardware I could reboot and request a boot to single-user or maintenance mode. Or, I could boot from media. But neither is possible here.
I plugged in an HDMI cable to the TV, plugged in a USB keyboard, and rebooted. The problem was that the early boot environment doesn't see a USB keyboard. So, I couldn't send any key to stop the automated boot and ask for a boot into single-user mode.
I manually shut down the network services, using
lsof -i to see what remained.
Then I manually unmounted the /boot/msdos,
/var/log, /var/tmp,
and /tmp file systems.
Then I manually terminated all the processes I could.
The getty processes respawn.
Finally, I forced a change from read/write to read-only:
# sync
# sync
# sync
# mount -f -u -o ro /
Now I could use tunefs to disable
the NFSv4 ACL enable flag in the file system,
and dumpfs to verify that it worked:
# dumpfs / | grep flags
flags   soft-updates+journal nfsv4acls
# tunefs -N disable /
tunefs: NFSv4 acls cleared
tunefs: filesystem reloaded
# tunefs -a enable /
tunefs: POSIX 1.e ACLs set
tunefs: filesystem reloaded
# dumpfs / | head -22
magic   19540119 (UFS2) time    Fri Feb 17 19:42:56 2017
superblock location     65536   id      [ 5887d304 7cce2791 ]
ncg     130     size    7787248 blocks  7540727
bsize   32768   shift   15      mask    0xffff8000
fsize   4096    shift   12      mask    0xfffff000
frag    8       shift   3       fsbtodb 3
minfree 8%      optim   time    symlinklen 120
maxbsize 32768  maxbpg  4096    maxcontig 4     contigsumsize 4
nbfree  883015  ndir    5571    nifree  3844183 nffree  471
bpg     7493    fpg     59944   ipg     30080   unrefs  0
nindir  4096    inopb   128     maxfilesize     2252349704110079
sbsize  4096    cgsize  16384   csaddr  1920    cssize  4096
sblkno  24      cblkno  32      iblkno  40      dblkno  1920
cgrotor 0       fmod    0       ronly   0       clean   0
metaspace 2392  avgfpdir 64     avgfilesize 16384
flags   soft-updates+journal acls
fsmnt   /
volname         swuid   0       providersize    7787248

cs[].cs_(nbfree,ndir,nifree,nffree):
	(1635,451,25991,4) (15,441,24276,7) (57,440,25955,109) (190,443,23526,23)
	(1949,30,23230,41) (2266,150,24514,113) (4308,356,26422,58) (3137,218,27997,61)

# tunefs -p /
tunefs: POSIX.1e ACLs: (-a)                                enabled
tunefs: NFSv4 ACLs: (-N)                                   disabled
tunefs: MAC multilabel: (-l)                               disabled
tunefs: soft updates: (-n)                                 enabled
tunefs: soft update journaling: (-j)                       enabled
tunefs: gjournal: (-J)                                     disabled
tunefs: trim: (-t)                                         disabled
tunefs: maximum blocks per file in a cylinder group: (-e)  4096
tunefs: average file size: (-f)                            16384
tunefs: average number of files in a directory: (-s)       64
tunefs: minimum percentage of free space: (-m)             8%
tunefs: space to hold for metadata blocks: (-k)            2392
tunefs: optimization preference: (-o)                      time
tunefs: volume label: (-L)
The soft updates mechanism drastically improves file system performance. It buffers metadata updates through a memory cache. Details are available at the FreeBSD disk tuning page.
Adding Samba and BIND
I ran out of space on /tmp
while doing the initial package updating,
so I umounted it for a while and let it use the root
partition.
At the end there wasn't anything left in /tmp
so there was no need to clean up before remounting it.
I later ran out of space again when doing a
pkg search, so I commented out the line
in /etc/fstab defining /tmp.
29 MB of space in /tmp just isn't enough!
It's a RAM-based "memory device", faster but limited in size. I could make it larger, but RAM is already limited on this platform.
There wasn't a package literally named "samba", or "bind", or "named". That's because those packages are available in different versions, with the version numbers in the names:
# pkg search '^bind|^named|^samba'
bind-tools-9.11.0P2            Command line tools from BIND: delv, dig, host, nslookup...
bind9-devel-9.12.0.a.2017.01.21 BIND DNS suite with updated DNSSEC and DNS64
bind910-9.10.4P5_1             BIND DNS suite with updated DNSSEC and DNS64
bind911-9.11.0P2_1             BIND DNS suite with updated DNSSEC and DNS64
bind99-9.9.9P5_1               BIND DNS suite with updated DNSSEC and DNS64
bindgraph-0.3_1                RRDtool frontend for BIND statistics
bindtest-1.56_1                Test bind() semantics of IPv6 sockets
samba-nsupdate-9.8.6_1         nsupdate utility with GSS-TSIG support
samba-virusfilter-0.1.3_1      On-access anti-virus filter for Samba
samba36-3.6.25_3               Free SMB and CIFS client and server for Unix
samba36-libsmbclient-3.6.25_2  Shared lib from the samba package
samba36-nmblookup-3.6.25       NetBIOS Name lookup tool
samba36-smbclient-3.6.25       Samba "ftp-like" client
samba42-4.2.14                 Free SMB/CIFS and AD/DC server and client for Unix
samba43-4.3.13_1               Free SMB/CIFS and AD/DC server and client for Unix
OK, so the package with BIND is called "bind" and not "named".
Package management on BSD (and Linux and Solaris)
I initially installed BIND 9.11 (bind911)
and Samba 4.3 (samba43),
went through everything that follows, and only then found
that Samba 4.3 only supports BIND 9.10.
Samba uses dynamically loadable zones (or DLZ),
which can be accessed through the AD schema.
We must have a compatible combination of BIND and Samba.
Here's the information from Samba's page on the
BIND 9 DLZ DNS back end.
| BIND Version | Supported starting with |
| BIND 9.11 | Samba 4.5.2 |
| BIND 9.10 | Samba 4.2 |
| BIND 9.9 | Samba 4.0 |
| BIND 9.8 | Samba 4.0 |
Let's install the latest available version of Samba, and the latest available and compatible version of BIND:
# pkg install bind910 samba43
Updating FreeBSD repository catalogue...
FreeBSD repository is up-to-date.
All repositories are up-to-date.
The following 43 package(s) will be affected (of 0 checked):

New packages to be INSTALLED:
	bind910: 9.10.4P6
	samba43: 4.3.13_1
	 [... more packages deleted ...]

Number of packages to be installed: 43

The process will require 404 MiB more space.
68 MiB to be downloaded.

Proceed with this action? [y/N]: y
Fetching bind910-9.10.4P6.txz: 100%    5 MiB 901.5kB/s    00:06
Fetching samba43-4.3.13_1.txz: 100%   21 MiB 810.3kB/s    00:27
Fetching libxml2-2.9.4.txz: 100%  740 KiB 378.9kB/s    00:02
[... more packages deleted ...]

[... many installations deleted ...]
The OpenLDAP client package has been successfully installed.

Edit
  /usr/local/etc/openldap/ldap.conf
to change the system-wide client defaults.

Try `man ldap.conf' and visit the OpenLDAP FAQ-O-Matic at
  http://www.OpenLDAP.org/faq/index.cgi?file=3
for more information.

[... more installations deleted ...]
Message from bind910-9.10.4P6:
**********************************************************************
*            _  _____ _____ _____ _   _ _____ ___ ___  _   _         *
*           / \|_   _|_   _| ____| \ | |_   _|_ _/ _ \| \ | |        *
*          / _ \ | |   | | |  _| |  \| | | |  | | | | |  \| |        *
*         / ___ \| |   | | | |___| |\  | | |  | | |_| | |\  |        *
*        /_/   \_\_|   |_| |_____|_| \_| |_| |___\___/|_| \_|        *
*                                                                    *
*   BIND requires configuration of rndc, including a "secret" key.   *
*    The easiest, and most secure way to configure rndc is to run    *
*   'rndc-confgen -a' to generate the proper conf file, with a new   *
*            random key, and appropriate file permissions.           *
*                                                                    *
*     The /usr/local/etc/rc.d/named script will do that for you.     *
*                                                                    *
**********************************************************************

[... more installations deleted ...]
Message from samba43-4.3.13_1:
===============================================================================

How to start: http://wiki.samba.org/index.php/Samba4/HOWTO

* Your configuration is: /usr/local/etc/smb4.conf

* All the relevant databases are under: /var/db/samba4

* All the logs are under: /var/log/samba4

* Provisioning script is: /usr/local/bin/samba-tool

For additional documentation check: http://wiki.samba.org/index.php/Samba4
The key for BIND was automatically generated the first
time it started.
The key is stored in
/usr/local/etc/namedb/rncd.key.
You use it if you control BIND with the program
rndc, but you will probably use the script
/usr/local/etc/rc.d/named.
Run it with no argument to see your choices, the
parameters start,
stop,
restart,
reload, and
status cover most needs.
I also added lsof and vim.
The next step...
The next step is to turn the new FreeBSD system into a slave DNS server.
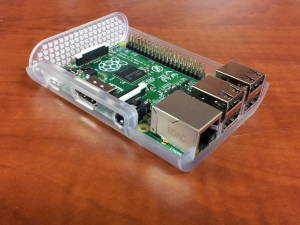
Raspberry Pi running FreeBSD with BIND and Samba software installed.